Hi,
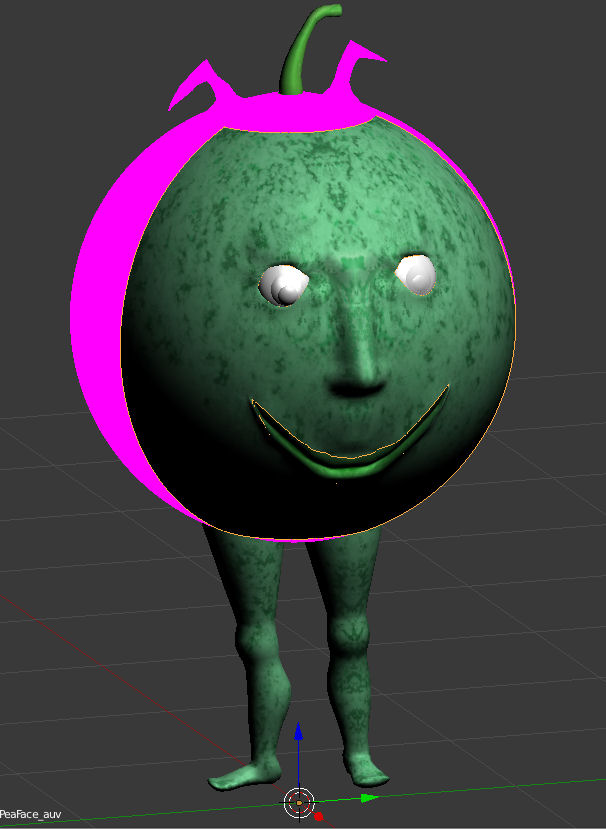
I just saved this adjusted model (I’ve been working on the eyes in Wings3d,) smoothed it and exported, then imported it to Blender 2.69 and when I turned on textures - it looked like this:
I don’t understand how a texture could be missing - it was there in wings3d when I exported.
But never mind that weirdness - how do I get the texture back?
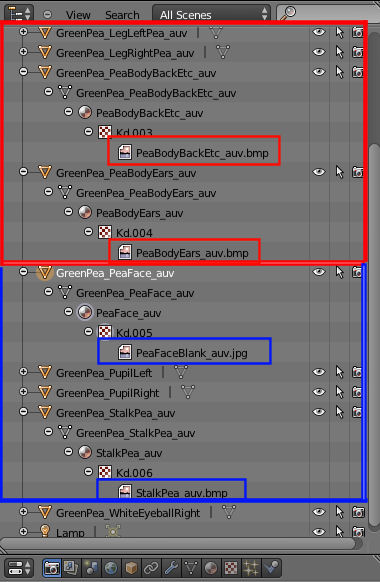
But when I look at the list - the texture seems to be there, the textures outlined in red are the missing ones, the ones in blue are not showing as pink in the viewport - but both look the same in the list. And when I click on it I can’t do anything to it, I can’t change it.
check to see that the faces in pink have been unwrapped by selecting them in edit made and pressing U, then checking in the UV editor to see that they are unwrapped.
Oh I see! Right, I get it now - that means two of the textures are in a different folder to the object file. Silly me. Still, it didn’t make any difference before.
Another question:
Will having different sections in the list I posted above make it impossible to rig this character? (that being why I’ve imported it into Blender)
Because if it will, then I need to find out how to glue these pieces together.
(P.S. Thanks for the reply, Modron, but this entire object is UVMapped and has been imported into Blender before, without pinkness - so it’s a bit of a puzzle, why it’s done it now. Um… I guess it must have been a different version of this - probably in the other folder.)
Ohhh geez… :rolleyes: It’s Fran… (I remember her from other forums, Bryce and Wings3D in particular.)
Anyhow, welcome to Blender! A whole new ball of wax to mess with, as you’re finding out already. But I think you’ll like it.
Select all the bits you want together by shift selecting in object mode, then CTRL-J. Should make 'em all into one thing. Odds are it’ll still need a bit of clean-up. Thus go into edit mode (tab), vertex options (CTRL-V) followed by Remove doubles (D). Then you should be good to go. Keep in mind that even for characters some things like eyes should still be separate parts.
BTW, rigging in Blender is pretty awesome with automatic weights. (It does 95% of the work for you. Some cleanup may be needed, but weight painting is fairly easy for the most part.) And there are other options like “bone relative” that are useful adding armatures to mechanical things where you don’t want organic bending. You should be able to find answers to most of that stuff in the Rigging and Animation Forum.