Second try on this—I apparently did something wrong on the first try, and it didn’t get posted (my profile says I have 0 posts, it should say 1).
I am an absolute beginner with Blender (using version 2.7). I am trying to figure out how to apply images as textures. Note that I have, unfortunately, already found out how to sculpt, which was definitely not what I was looking for. I’m just trying to apply the textures in the same way one would apply paint. Flat.
A tutorial I found (for Blender 2.5) wants me to go to the Materials panel (shows it as being on the right), but I can’t find anything that has a similar label or looks even remotely close to what’s on the screen. My own attempts leave me with a still-blank cube. The image is selected, the brush is selected, etc., but nothing happens.
Can someone please either help here or point me to the tutorial I should be using (i.e., one for Blender 2.7)?
All new users are subject to moderation for their first 10 posts. This means that the post/thread will need to be approved by a moderator before it becomes visible.
About your problem:
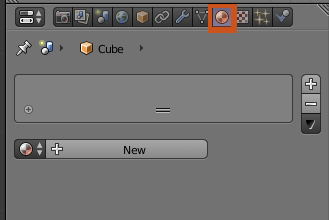
Go to the Materials Panel (:evilgrin:)…
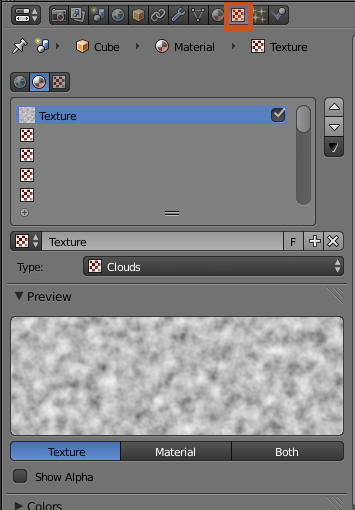
Add a new material. After that you can go to the Textures Panel if you want to add an image or something as a texture.
if you have a brush selected it sounds like your in texture paint mode (or still in sculpt mode!) either way if your just looking to apply an image to your cube. you will need to unwrap the cube first. this simply means laying your 3D model out onto a 2D surface. much the same way that you would unfold a cardboard box
first you need to be in edit mode and you’ll have to mark the seams where you want the cube to unfold. simply select a few connected edges that look like they would be the seams of a box and in the tool panel under the shading/uv tab press the MARK SEAM button then select all the edges of the cube (press A until everything is selected) then press the unwrap button in the tool bar. now choose unwrap from the menu.
open up the UV editor window and open your image, and select all the vertices of your unwrapped cube and position them on the image. you can scale and rotate them to get the right position. now you can use the image as a texture. how to do this will depend on the render engine you are using, for blender internal just use the materials/ textures tabs they havn’t changed any since the 2.5 video you were watching so there should be no issues there.
or
if your using cycles you will want to follow a more recent tutorial. just google texturing in cycles, but it is as simple as adding a texture node in the materials compositor and plugging it into the default diffuse node. ( thats about the limit of my cycles knowledge, so yeah… Google)
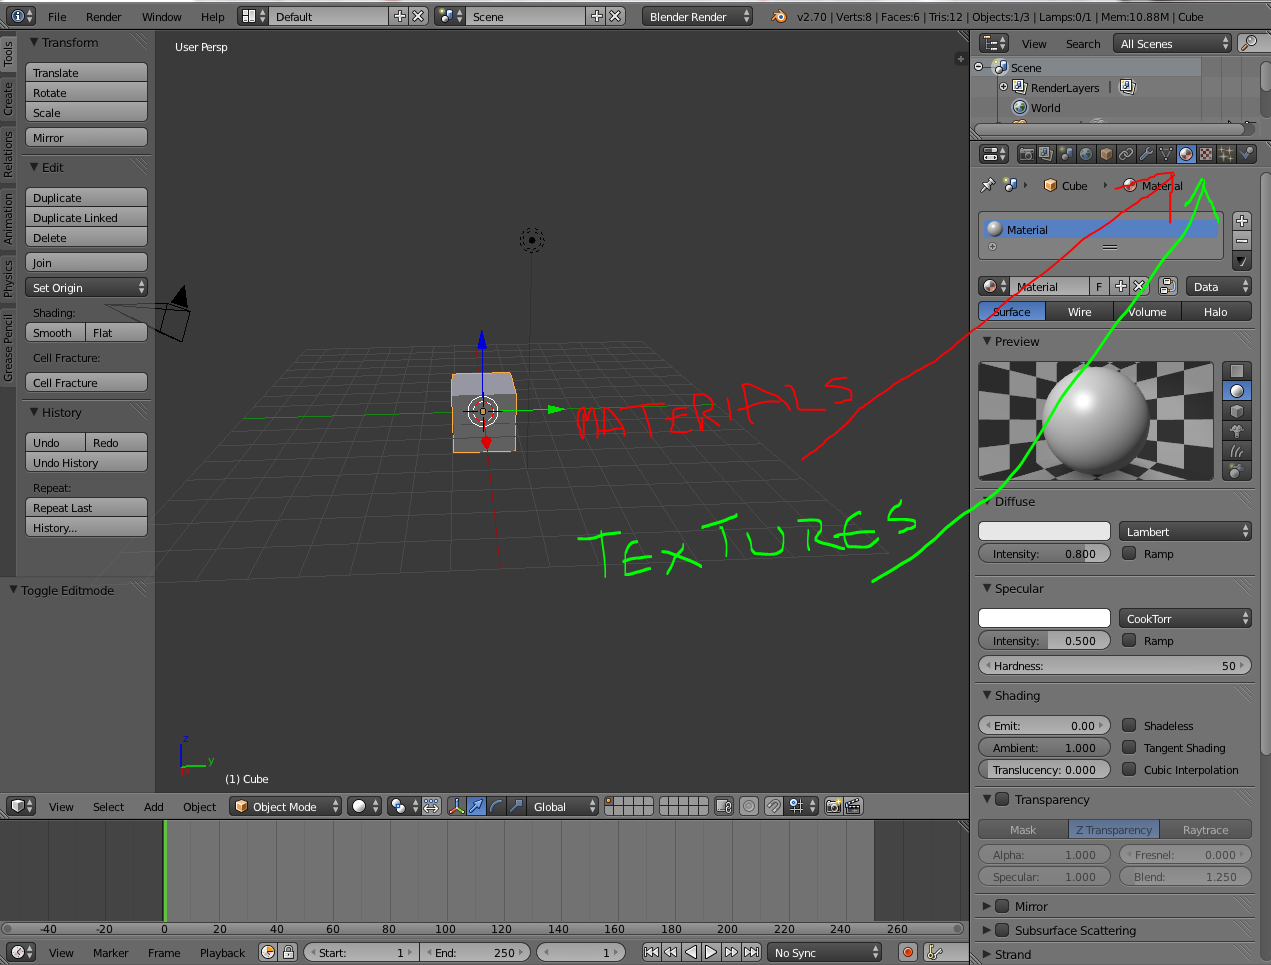
Ok, first, the materials panel. Which, as I posted in my first post, I can’t find, so I’m going to need a little bit more than that, please…
Where, exactly, is this materials panel? What mode do I need to be in to find it? What mode do I need to be in to apply textures (I’ve
tried them all … sculp mode does exactly what I do NOT want to do, vertext paint and weight paint don’t seem to know what textures are (or at least, not that I could find), and in object mode, edit mode, and even paint texture mode, nothing happens (I can select the file and get the texture image, I can then select a brush (not sure which TO select), but then, nothing happens. I’ve been trying this on a cube which, per a Blender 2.5 tutorial, I added some extra faces to using extrude and subdivide before I hit my real project.
Where I’m stuck, at least as far as I know, is finding this materials panel so I can add whatever object I need to add so I can apply the textures to the objects I am trying to add them to.
Second, what kind of material do I need to add before I can start adding textures to my first project (a space-based warship)?
Thanks,
–jim
PS: I’ve seen quite a few tutorials that mention and use the materials panel, and, despite the fact that they blow through that at 200 mph, I THINK I know where they’re accessing it from, but when I go to that spot on the right, it isn’t there. Did something change from, say, 2.5 to 2.7 in the UI?
PS: I’ve seen quite a few tutorials that mention and use the materials panel, and, despite the fact that they blow through that at 200 mph, I THINK I know where they’re accessing it from, but when I go to that spot on the right, it isn’t there.
Have you a suitable object selected ? You can’t add a material to nothing or a lamp, empty etc.
Show us what you can see
Did something change from, say, 2.5 to 2.7 in the UI?
No.
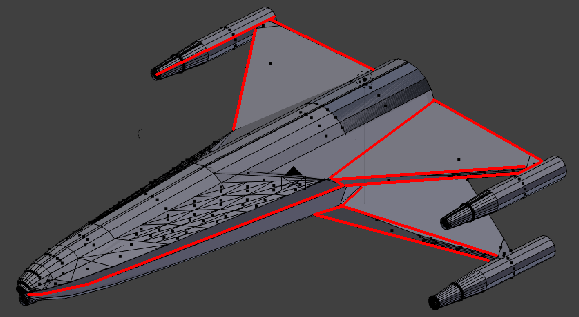
I have the cube I added (again, just for testing—the image I posted a few minutes ago is what I’m really trying to get to) for testing. As for whatever I’m supposed to add from the materials panel, I don’t know what I’m supposed to add from there before I can apply textures to first the cube, and then in my project.
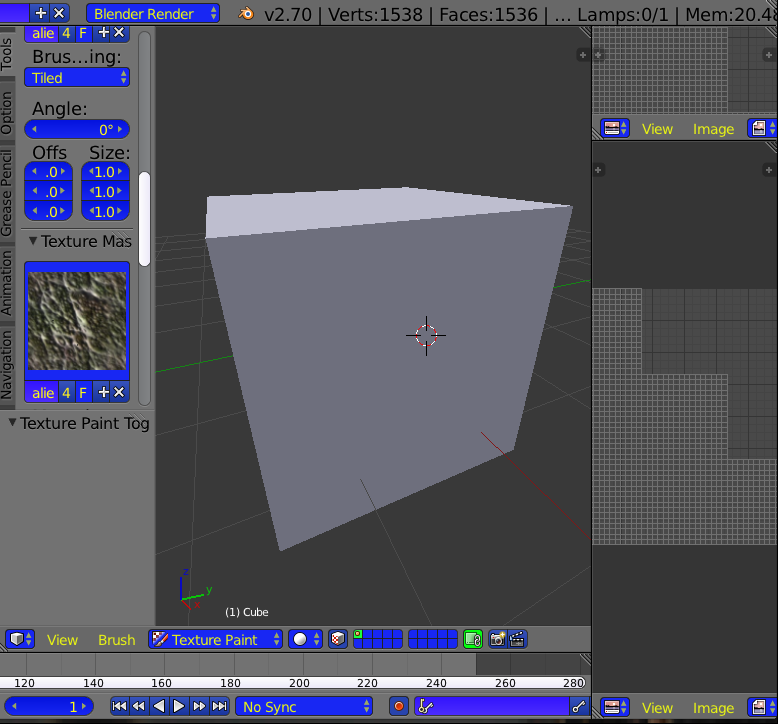
The attached image shows the point I’ve gotten to. The cube is split in the UV editor, but not in the view itself (not sure what I did wrong there). However, the selected texture image (selected to be VERY visible if applied) is not showing up when I try to add it.
ok, your in texture paint mode thyats fine but you need a texture to paint onto. this is where your unwrap needs to happen, but looking at your model ship you have a major issue with multi sided faces. a face with more than four sides generally unwraps very badly. when modelling do your best to keep all your faces as quads, ie four sided faces. but as you are going to texture paint we can probably work around that little faux pas.
in the uv window click the new button and your new image dialog box pops up name it something sensible like ship texture and set the pixel size. 1k is a bit small so set it to 2048x2048 for a better image (you could go higher but theres no need for this model) now back to the 3d window in edit mode, mark your seams around the ship like so, make the same seams on the opposite side too
then select the faces of each section and line the view of the model so your basically looking down on the faces. from the unwrap menu choose project from view. as each section is unwrapped it will appear in the uv window. your new image may dissapear when you select the faces on your ship, don’t worry just click the image icon next to the new button and select the ship texture again. move the uv islands as they are unwraped and place them on the image. you want to avoid having your uv islands overlapping.
oncee all the sections of the ship have been laid out open up the texture paint window again, your model should appear jet black as that is currently the colour of the image once you start painting though your paint strokes will appear on the model as well as on the image in the uv window.
important!
you’ll need to save the image before you close blender. just saving the blender file will NOT save your image!
in the uv image window on the footer next to the add new mage buttons there is a menu named image. there will be an * after the word image, this indicates you have an image with unsaved changes. click that menu and choose save as image the file browser will open and you can then save your image in the folder you desire. once you press save the little * will have disspeared. indicating that nothing needs to be saved now. just save the project as normal and whne you next open blender the image will be there.
Wow … that’s a lot to follow. But it sounds like it is also exactly what I need. Thanks to my first cancer (3 brain tumors, 3 brain surgeries, EXTREMELY HARSH chemo, and whole-brain max-dose radiation therapy), I’m going to have to re-read that about five times before I even start, but that’s sometime I know I just have to live with.
Many thanks. I’ll have to work on this tomorrow, though—my brain has (again, thanks to cancer #1) gone all foggy now. I do have limits as to how much time I can spend on stuff like this before that happens. Try anymore tonight, it’s migraine city and it could be a week before I recover enough to start again.
Btw, I saw something in a post somewhere about Blender mentioning “tris2quads” or close to that. Is that something I could use to fix my ship images (not just this one)? Where would I find that in the menus//panels//whatever ??
i dont know the shortcut off hand but if you press the space bar and type tris to quads in the search it may find the function. i’m not sure of the exact name though
Hmmm, both reply and reply with quote don’t add the quote… Anyways, I found it. It’s
mesh menu —> Faces —> Tris to Quads and the shortcut is ALT-J (seems like it should be CMD-J, but even on my Mac, it says it’s ALT-J).
Ok, now I’m mad…the site ate my post just now so I have to do it all over again.I finally got some time to play around with the ship image again today, and I found something very useful for cleaning up all of the triangles that tris to quads didn’t clean up… Mesh—>Clean Up—>Limited Dissolve. What was a bunch of noise on both front sides is now just a few rectangles on each side.
I was also playing around with Weight Paint mode last week, and (maybe due to all of those tiny triangles and the RAM they no doubt ate), it got VERY memory-intensive. I was able to get a nice fiery design on the ship’s fuselage, but the strange thing is, it ONLY showed up in Weight Paint mode. I’m sure I missed something there, but what, I don’t know.
I might just go with the plain grey that you see in all except Object mode, if that’s possible. It doesn’t look bad just like that, though I did like the fiery color scheme.
weight painting has nothing to do with texture painting
it is used for defining what areas of a mesh will be deformed (usually by an armature but other uses too)
note after the clean up (tris to quads etc) it will need unwrapping again usually