The problem with the ‘Shadows’ pass in Cycles is that it will still include shadows and shading that an object will cast onto itself, which is no good if you want to isolate the shadow cast onto terrain by ONLY a CHOSEN object without any shading or shadows cast by the terrain onto itself or from other objects.
So this is how I solve it; shadow catching in Cycles. It is a bit complicated but the time spent setting it up really pays off when rendering lots of frames.
Let’s say you have:
Layer 1:
A model of an undulating Terrain with a tall rock that extrudes up from the terrain resulting in a single mesh that casts a shadow onto itself. This is the main problem.
Layer 2:
A sphere that casts a shadow onto the terrain.
Layer 3:
A cube that casts a shadow onto the terrain
The end result we want, is for ONLY the shadow cast by the sphere onto the terrain to be seen, with all its graduating transparency, completely surrounded by total transparency so that it is easy to comp onto (lets say) a real world photo of the terrain that the terrain model was based on. We DO NOT want the shadow or shading cast by the terrain model onto itself (that is already on the photo!) and we do not want the shadow of the cube.
-
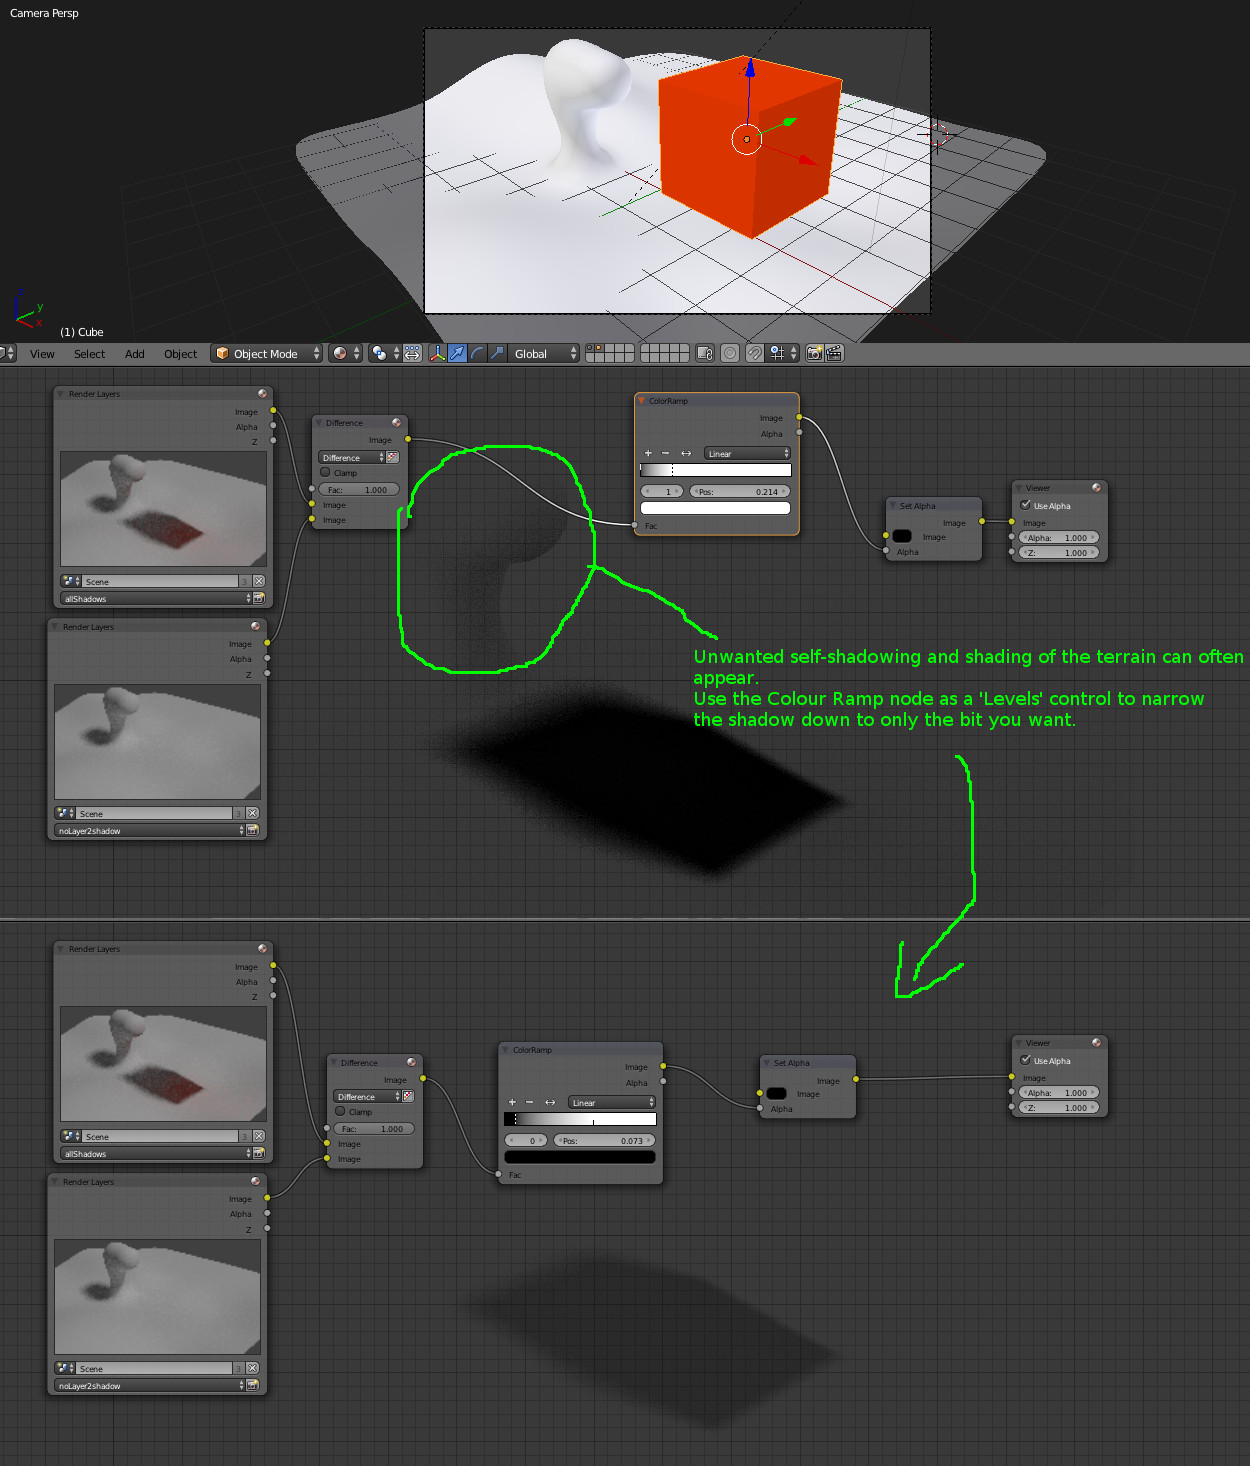
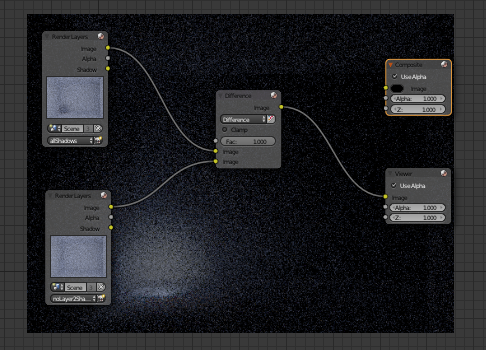
Create a Render Layer called ‘allShadows’ with all Layers renderable under Render Layers ‘Scene’, but only Layer 1 outputting to image under Render Layers ‘Layer’, then render the Shadow pass of this out, giving you the terrain with the shadow of the sphere and cube and also the shading/shadow that the terrain model casts onto itself. The actual sphere and cube will not be visible.
-
Create another Render Layer called ‘noLayer2Shadow’. This is exactly the same as ‘allShadows’ except we click the ‘Exclude’ for Layer 2. The Shadow pass of this will give you the same as above except the sphere’s shadow will not appear on the terrain.
-
In your compositor, use a mix node set to ‘Difference’ to find the difference between the two above shadow passes – the only difference between the two is the shadow cast by the sphere – so the result of this difference mix is an image of only the sphere’s shadow cast on the terrain and all else is white – the cube’s shadow is gone, and most importantly, the shading and shadow that the terrain casts onto itself is also gone – we just have a white image with the sphere’s shadow as cast onto the terrain on it.
-
If there is any unwanted surrounding noise, use a Colour Ramp node to to act as ‘Levels’ to get rid of it and narrow it down only to the sphere’s shadow.
-
Feed the result of 4 into the ‘Set Alpha’ node’s alpha input, leaving the image input as a plain colour that defines the colour of sphere shadow. Now the Sphere’s shadow will be degrees of transparency within a totally transparent surround.
-
Use other Render Layers to put the objects back on top of the shadow (‘Alpha Over’ node) but you can still independently control the sphere’s shadow!
This can also be done to some extent with other passes like Diffuse and Glossy passes.