No, your eyes are not deceiving you, this image really is showing real caustics of varying qualities without the use of the ‘Filter Glossy’ option.
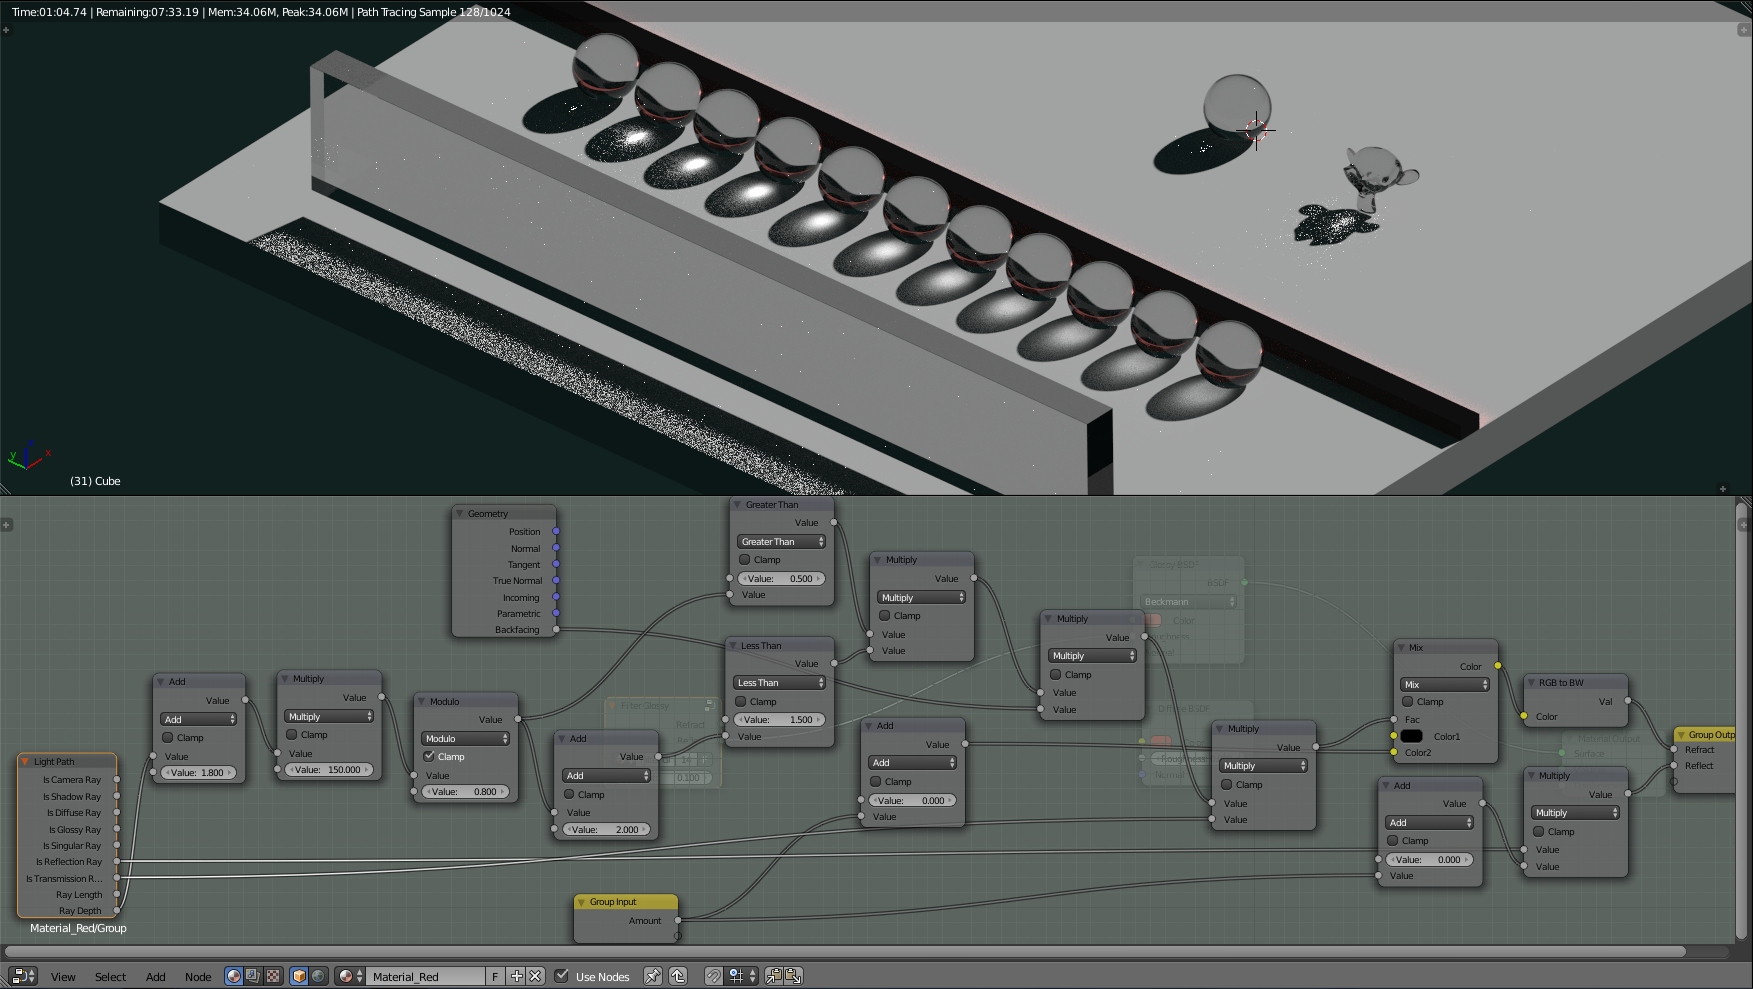
How, by using a node group that produces an equivalent via the magic of using lightpaths to make the glass material rougher (and easier to get caustics from) for invisible lightpaths while ensuring that the only thing seen by the camera is sharp glass.
It took me a good week of off an on work to finally figure everything out, the final breakthrough came when I figured I could increase the roughness for a bounce every two bounces (using the raydepth information when the ray goes through the backface of the glass) and alternate it with a completely sharp transmission bounce to all but ensure that you still see sharp glass even as you layer multiple objects in front of each other.
The fact that it really is true that every other ray bounce (providing it’s a transmission bounce) is an exit from a glass object is what makes this work, the only reason it wouldn’t is if there’s overlapping glass objects, something which isn’t seen in real-life anyway.
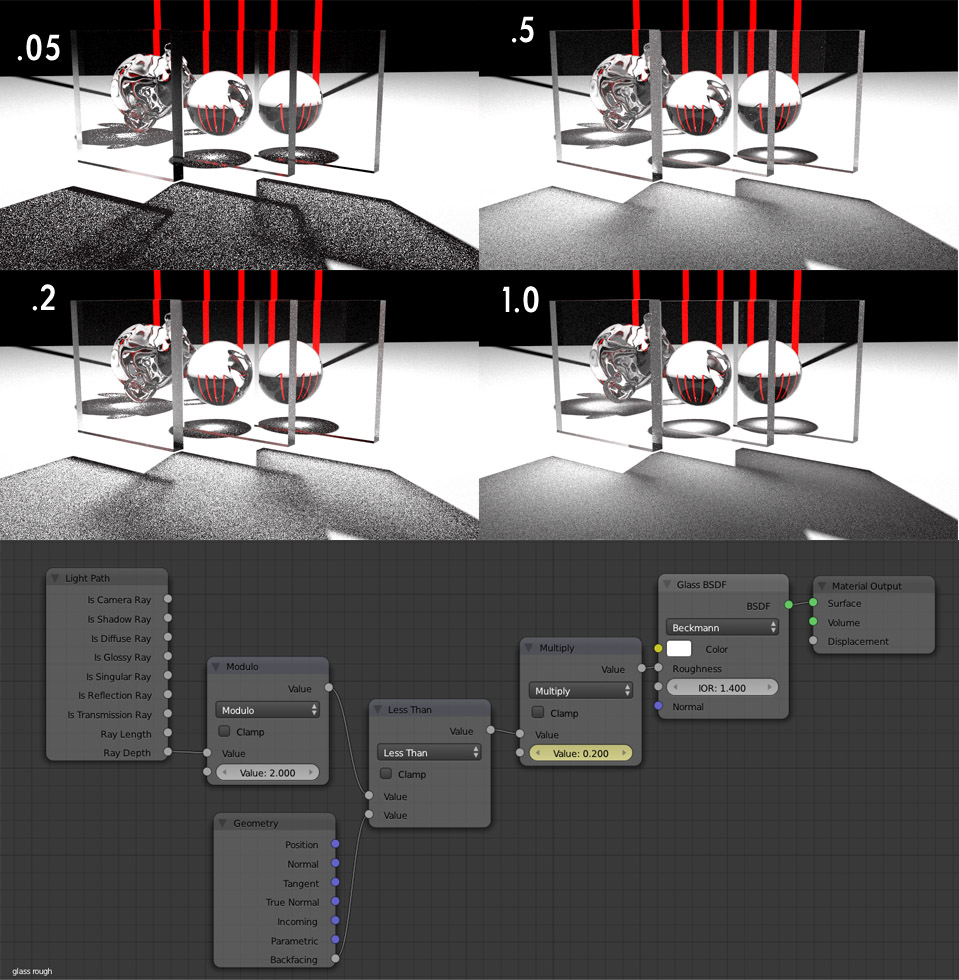
Also, this opens up a nice and potent trick to get decent caustics out of Cycles when you do this in concert with setting the ‘Filter Glossy’ setting to 0.10, in which even complex glass objects will produce converged caustics well before the engine runs out of random numbers.
can you explain the string of math nodes coming off of the raydepth input? it seems like a bunch of floating point math on an integer input (and some big numbers) just looking at the nodes, I’m unable to parse the logic.
Well, the magic is mostly in the modulo node, what it does is create a sort of frequency wave that continually goes from zero to one every two bounces.
The greater than and less than nodes then combine with multiply to make sure that the mask is only in effect every two bounces (ie. mapping the data to 0 and 1).
This type of complexity is required for transmission rays though because Cycles doesn’t have a separate flag for indirect transmission bounces that leave the volume (it’s also considered a transmission ray). It’s actually a lot easier to do for reflective surfaces as you also see in the image.
I see a light path, which is essentially nothing, going into an add, then a multiply, then a modulo(what the hell is that?)…then it is split into an add and greater than, etc…all with nothing at all happening in between. What is multiplying? What is adding? Maybe I’m dumb as a stump, but this makes no sense, and if this is the way of making materials in the future, hello 1987!
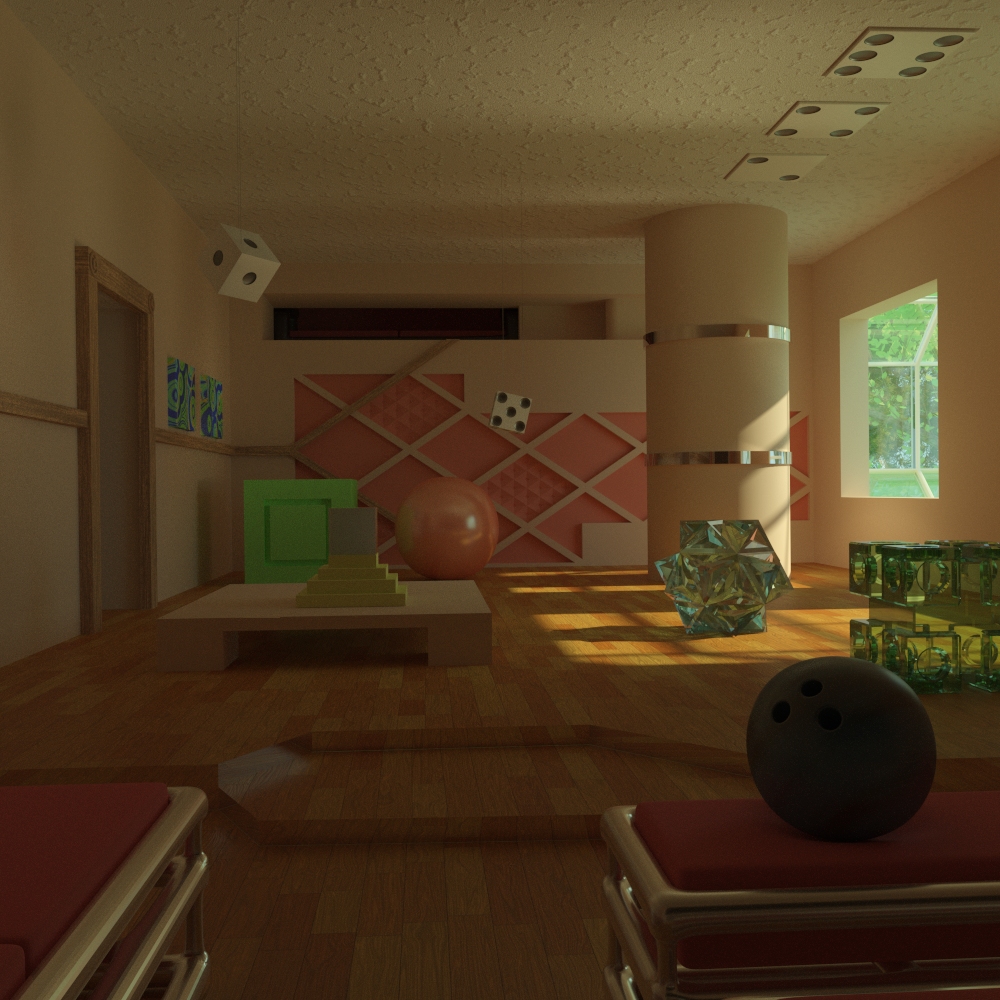
EDIT: Have you tested this in a room…a REAL room, with more than one light going on? You got my vote if you can produce that
I haven’t tried multiple lights (there’s no real reason why the ray depth information would be different if some rays are going to different lights since they all come from the camera), but I do have a room.
This uses the combination of the group node for sharp reflections and refractions along with having ‘filter glossy’ at 0.10 (especially note the caustic pattern of the glass object in the sun).
The exterior glass still uses a trick to bring the light in because as long as Cycles is a unidirectional pathtracer, it won’t instantly turn Cycles into Luxrender (but the caustics are better than they would be otherwise).
That’s a cool room! As far as the glass is concerned, it looks alright to me, but I’m still not sold on the node setup. It seems like far too much effort for something barely noticeable
Without the group node, you would need to crank up the ‘filter glossy’ setting which in turn would blur your caustics and blur out all of the sharper details, this allows you to have caustics with sharp patterns where needed (in conjunction with ‘filter glossy’ at 0.1) and blurred, but convincing and fast rendering caustics for things like glass spheres.
Also, all of these math nodes are needed, otherwise you have instances where caustics won’t render with complex objects or instances where looking through multiple layers of glass will result in blurry refraction visible to the viewer.
Great work Ace, wow, this really amazes me! You never learn out with Blender
I wonder, does this work with a prism, like having an white to rainbow ? I am still not getting it in Blender (cause of unidirectional).
Many thanks!
I haven’t tested, but it might work if you use the system with multiple glass nodes which is the usual workaround for prisms (since Cycles is not spectral-based).
I think I managed to simplify down this technique a lot. I kept the integer functions on the ray depth as integers and removed a bunch of other nodes that didn’t seem to contribute to the overall effect. Still super handy to be able to control the filtering strength, so it’s a good start, ace. Just try to keep it simple next time…
@vicky, Remember way back in elementary school when they taught you short division, where you would end up with a remainder? A remainder is the modulo.
So, in this case, we are dividing the ray depth(how many surfaces the ray has passed) by 2. if it divides evenly by 2, that means that the ray has passed in and out of our glass material, returning 0. If it is odd, the ray is currently inside of our object and the node returns 1. the next node is hooked to our backfacing input, which is either a 0 or 1, depending on if the ray is interacting with the inside or outside surface of the object , and it compares the modulo we calculated earlier to it. If our modulo is 0 (ray inside object) and our surface is backfacing (ray leaving object), then our node group returns 1. this is then plugged into a multiplier, shown keyframed in the node image above. this multiplier is how you change the level of the effect, everything else shouldn’t need to be changed.