Hello, I am making my first character in Blender and am in the stage where I am rigging it for animation. I followed the instructions of several tutorials that I found and have been able to replicate a few of the results; however, I keep running into frustrating problems. I have managed to get around most of them, but then I hit this one. Look at the selected vertices in the picture below.
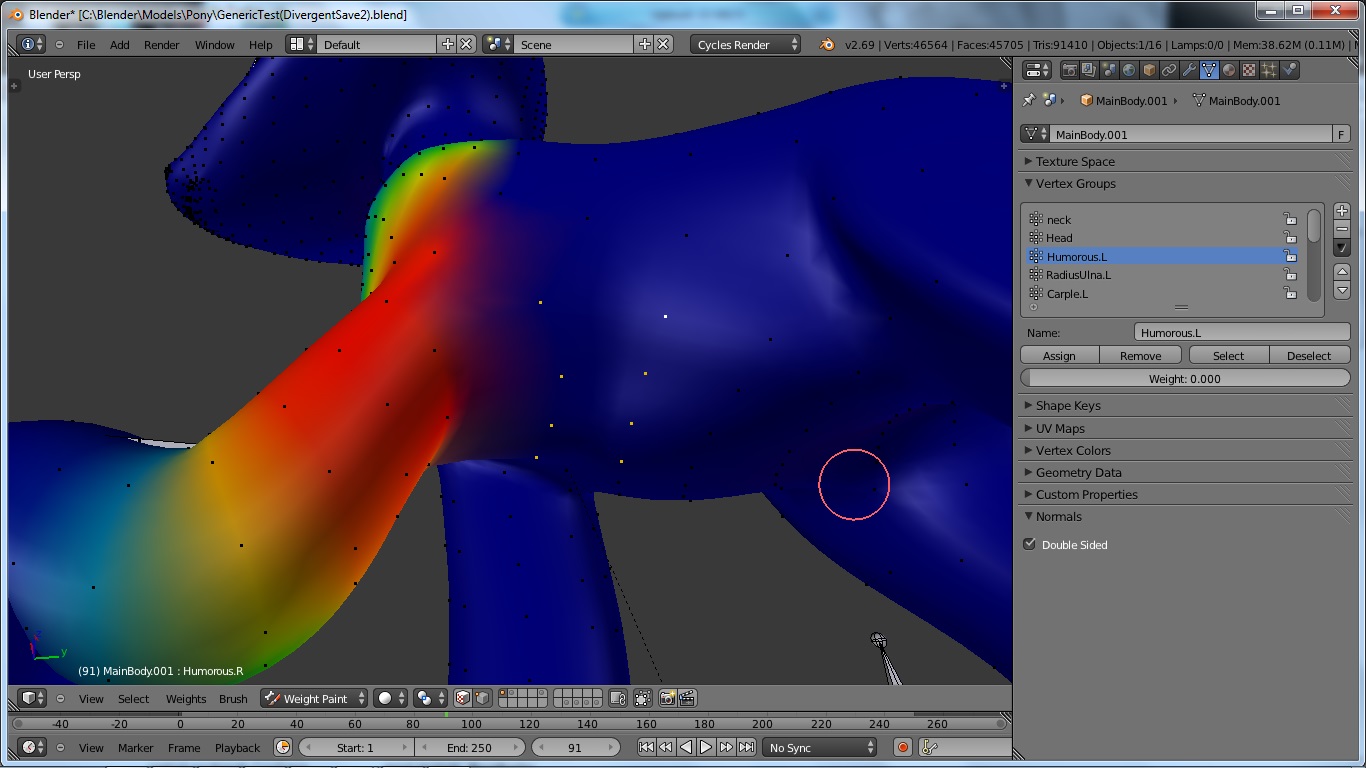
They currently have a weight of 0 assigned. Now, look at what happens when I give them a weight of .001.
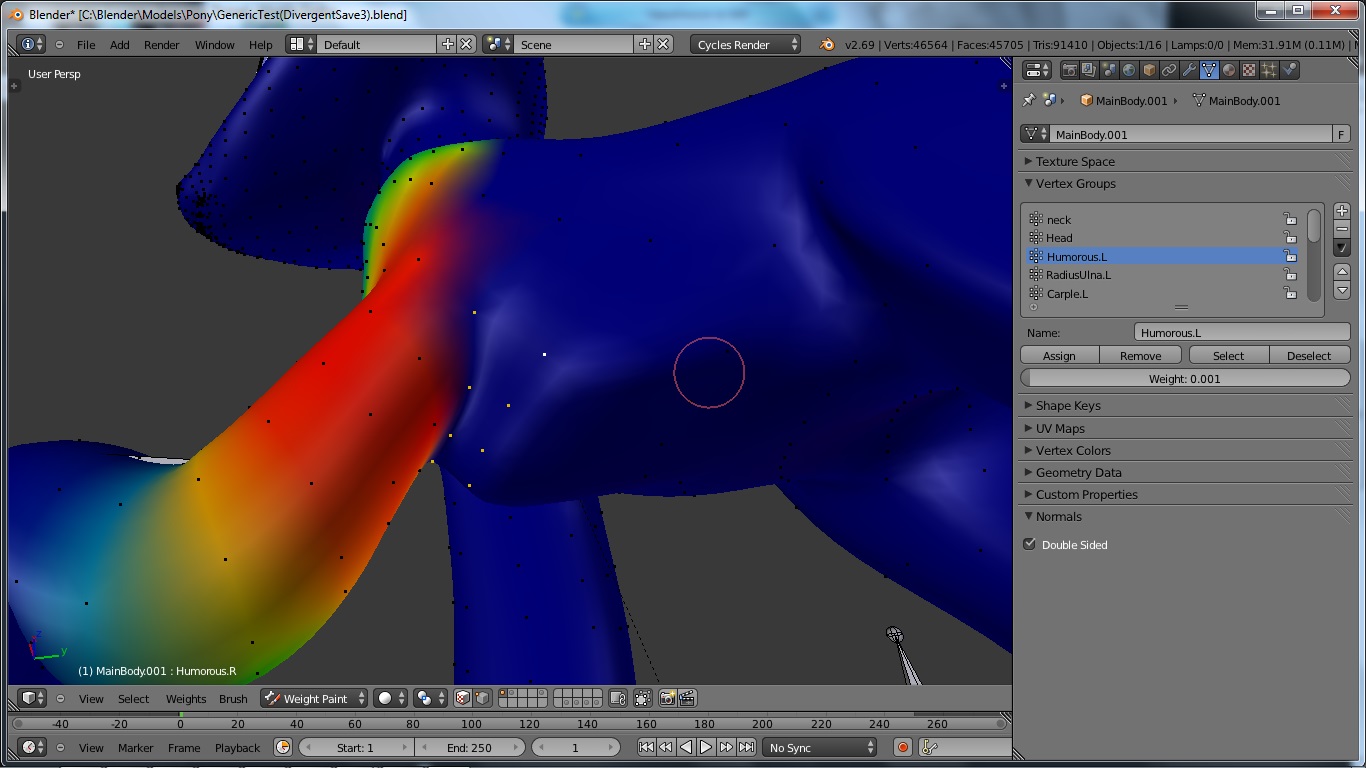
Notice how they have been affected. By comparison, look at a weight of 1.
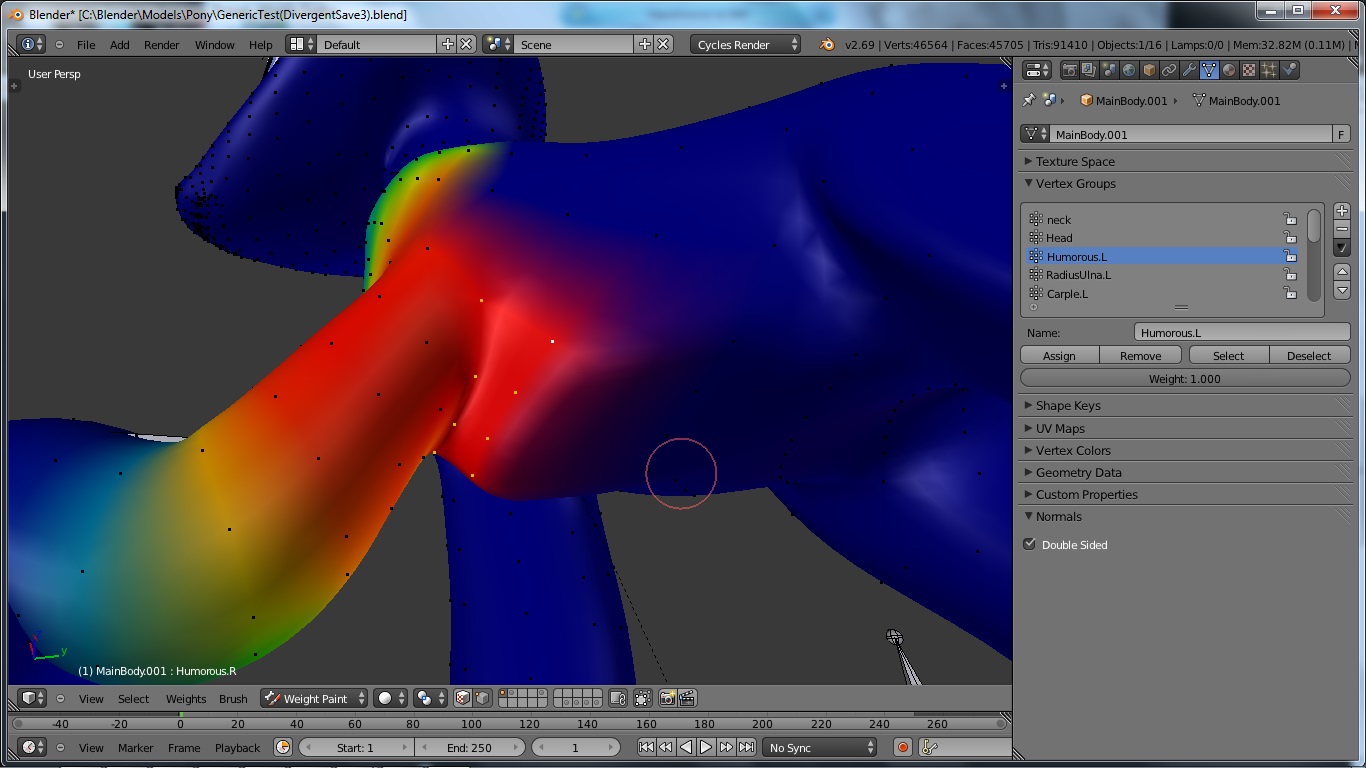
The geometry has been affected in the exact same way. It seems as if it is acting as an All on or All off sort of deal because any value between .001 and 1 gives the exact same result.
I have tried for the past half hour to figure out why this is happening, but have not been able to figure out why. The armature is set to only effect vertex groups, the envelopes are turned off. Additionally, the multiply button in the bone menu for all bones is turned off, so as far as I know there is no influence from the envelopes. But what really chaffs me is that I had already gotten the section to work very well. I then went on to work on the hind legs that are controlled by a different vertex group, and then when I came back for final tests, the weights were messed up like this. Come to think of it, I have been having this kind of problem the entire time. Example: Work on section A, move on to section B, go back to section A and find that the geometry does not work in the least bit (Even though no vertex group but the one in question has any influence over the vertices that have stopped working correctly.) This is getting very frustrating because this is the fourth time I have vertex painted this particular section, just to have it stop working.
So boiled down, I guess my two questions are, how do I over come the problem depicted in the pictures, and is vertex painting usually this difficult?