Heya. I’ve been looking around at techniques for generating greyscale depth maps of a scene from blender, but unfortunately this seems to be used most often for post-processing and while you can tweak the depth map with curves and such to get the desired effect for that, I need a very specific depth map generated. What I’m trying to is render a scene and it’s depth map in Blender and then use those as pre-rendered backgrounds in the Unity game engine, using a shader that uses the depth map and the unity camera’s depth texture to decide whether to draw the background or the real time geometry. To make this run smoothly, the exported blender depth map and the unity depth texture need to line up.
Currently, the shader I’m using converts the unity depth texture into a greyscale map where 0 (black) is the eye position and 1 (white) is the unity camera’s far-clip plane. I’d like to do the same in Blender using the node editor, but I can’t seem to find much information on what the range of “Z”, how to render a depth map in a specific range, etc. If I could render a depth map exactly how Unity does it, where the eye position is black and the far-clip plane is white, it should line up perfectly, but I haven’t had any luck.
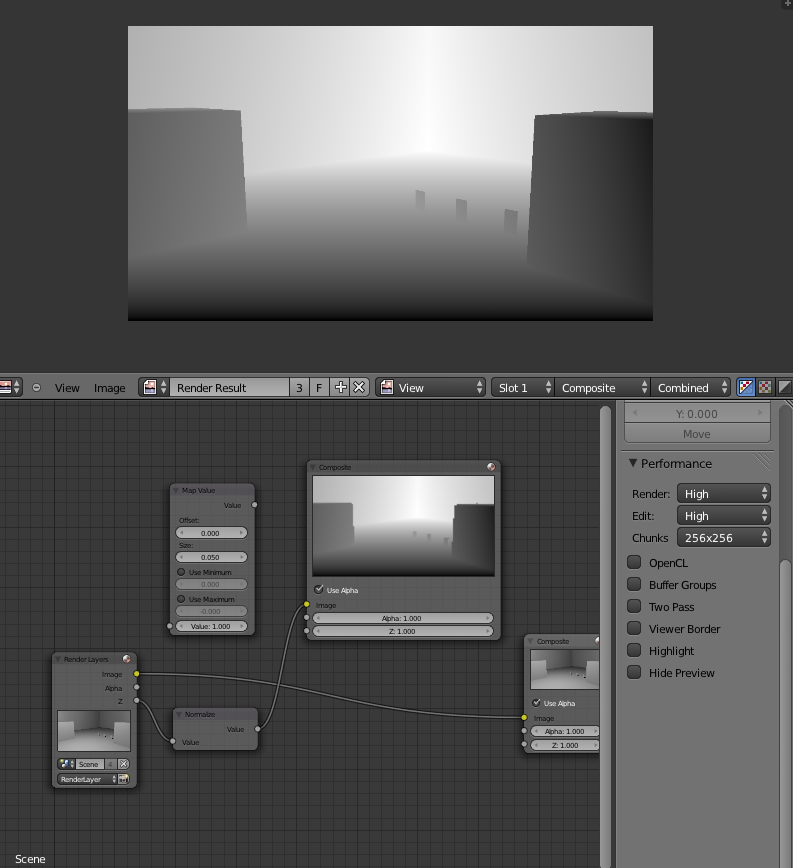
I am currently using the node editor to output Z to “Map Value” with a size of 0.05 and an offset of 0.0 and outputting that to an image. I read somewhere that Z is dependent on the camera’s far-clip plane, but changing it’s clipping doesn’t seem to affect the range it generates.
So, in short, I need to generate a greyscale depth map where black is the eye position and white is the far clip plane (or a specified value). Thanks in advance!
And where do I put this node? I tried normalizing Z’s output and it seems to normalize the output image, making the closest visible point black and the farthest visible point white, rather then making it a range where black is the eye and white is the far clip plane. I took the image into photoshop to confirm that the closest point is “0” and the farthest is “255”.
I tried this and got the same result. The closest visible parts are black and the farthest visible parts are white. This is what I expect from Normalize. What I need is to set it it up so the white is always at either the far clip plane or a specified distance whether that point is visible or not and black is always at the eye, which in most cases will never be visible. This would leave pretty much everything else in the grey range, which I understand isn’t as good for precision, but I’m more worried about matching the greys up perfectly with the real time rendered depth map.
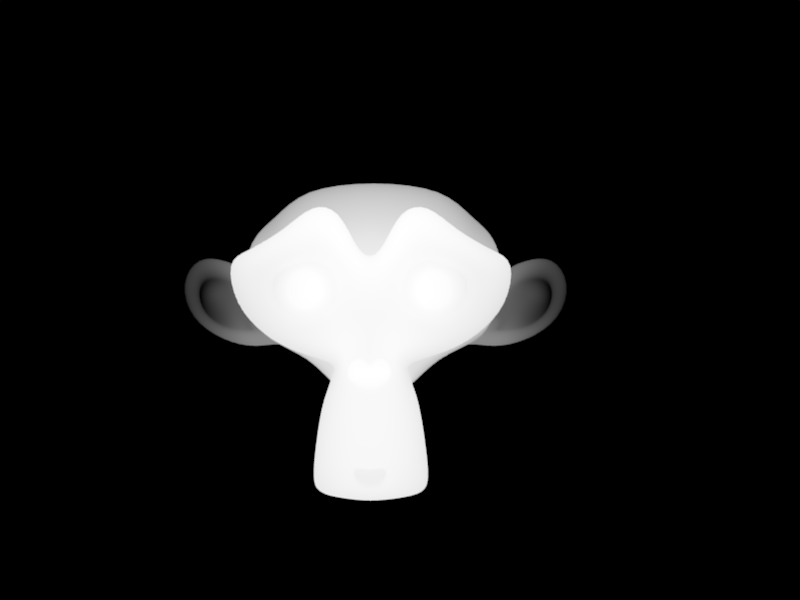
If you want a descent depth map then Normalize just isn’t gonna cut it. The result will change as objects move in and out of your scene. See how the image changes between image 1 and image 2? Both are depth maps rendered via normalize node and the monkey in front never moved. No settings were changed aside from adding the other 2 monkeys. That’s what a constant 0-1 range will do for you.
Yeah, I understand the way normalize works, which is why I uploaded a screenshot and explained why it won’t work for me in this situation. I still can’t seem to find out how to render a depth map of a specific range, which is what I need.
The mist pass is set to 0-1 based on scene distance. It will give you the colors you want, but it’s antialiased and follows alpha maps. That may or may not be what you wanted.
RGB values of Z in blender describe the distance from the camera plane and the point in space in blender units (BU).
Point “on camera” (distance of zero) is black. Points 0.5 BU from the camera are R: 0.5, B: 0.5, G: 0.5.
Points that are 5 BUs from the camera will have the RGB values of Z of 5.0.
In most cases our scenes are much larger than 1.0 BU, so visually you’ll see white (1.0) and above almost all over the image.
What you are trying to do is right, but you need to do the math.
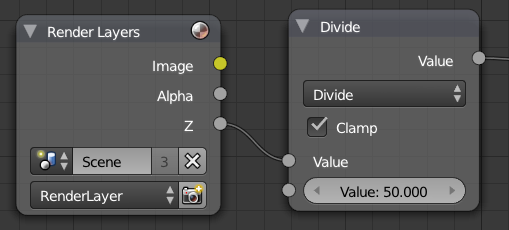
Say your “far clip plane” is at 50 BU.
In such case all you need to do is to divide Z by 50. Then of-course you’ll need to clamp the values such that everything that is 50 BU from the camera and above becomes white (1.0). Without clamping you may have values greater than 1.0.
In your scenario none of the methods described above will work as they are not precise. I’d not recommend using “normalize” in any case, because it won’t work in animation.
Here’s all that needs to be done:
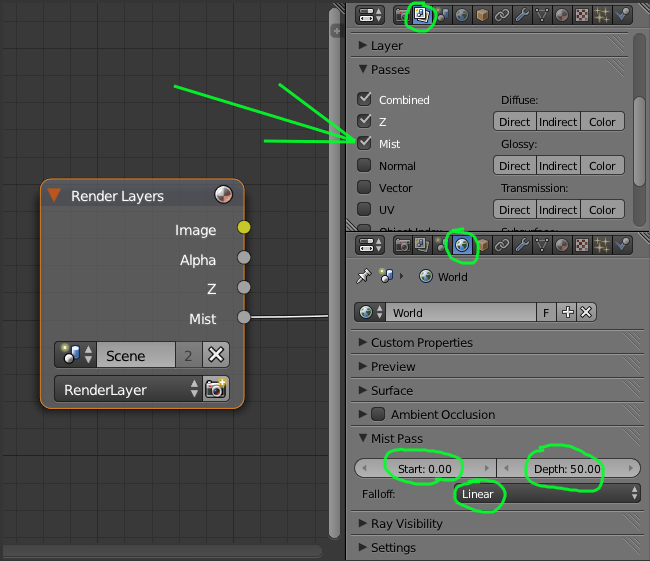
Using Z has its cons. Z pass in Blender is not antialiased. Sometimes it’s better to use mist pass.
When using mist pass you’d want to have the following settings:
In cycles: Mist pass needs to be enabled in render passes and proper settings of it need to be set in world settings:
Thank you, BartekSkorupa. You seem to have hit the nail on the head. This is exactly what I needed. I couldn’t find an explanation as to what exactly Z outputs anywhere. This is just what I needed. Thanks!
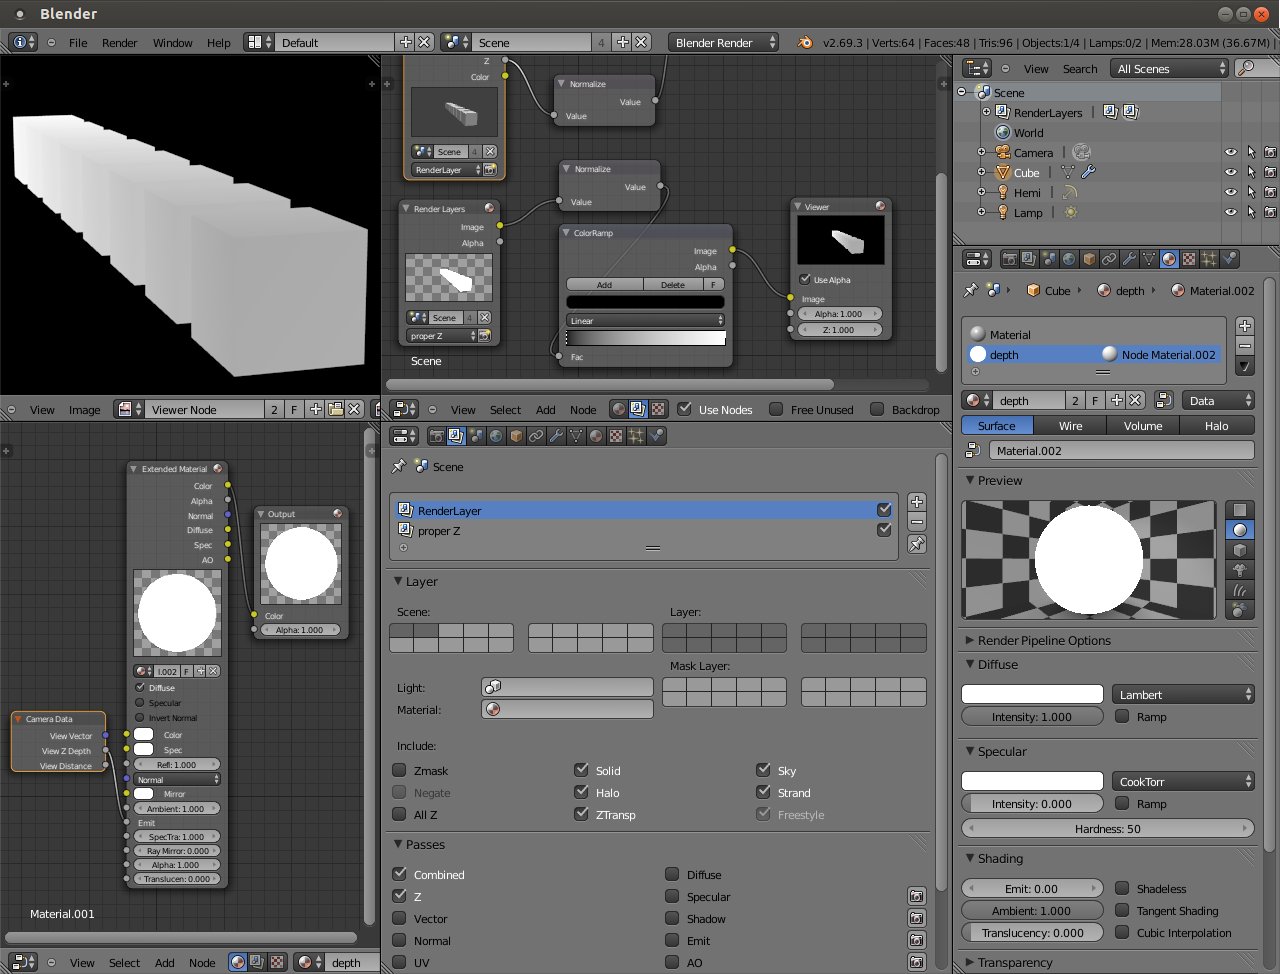
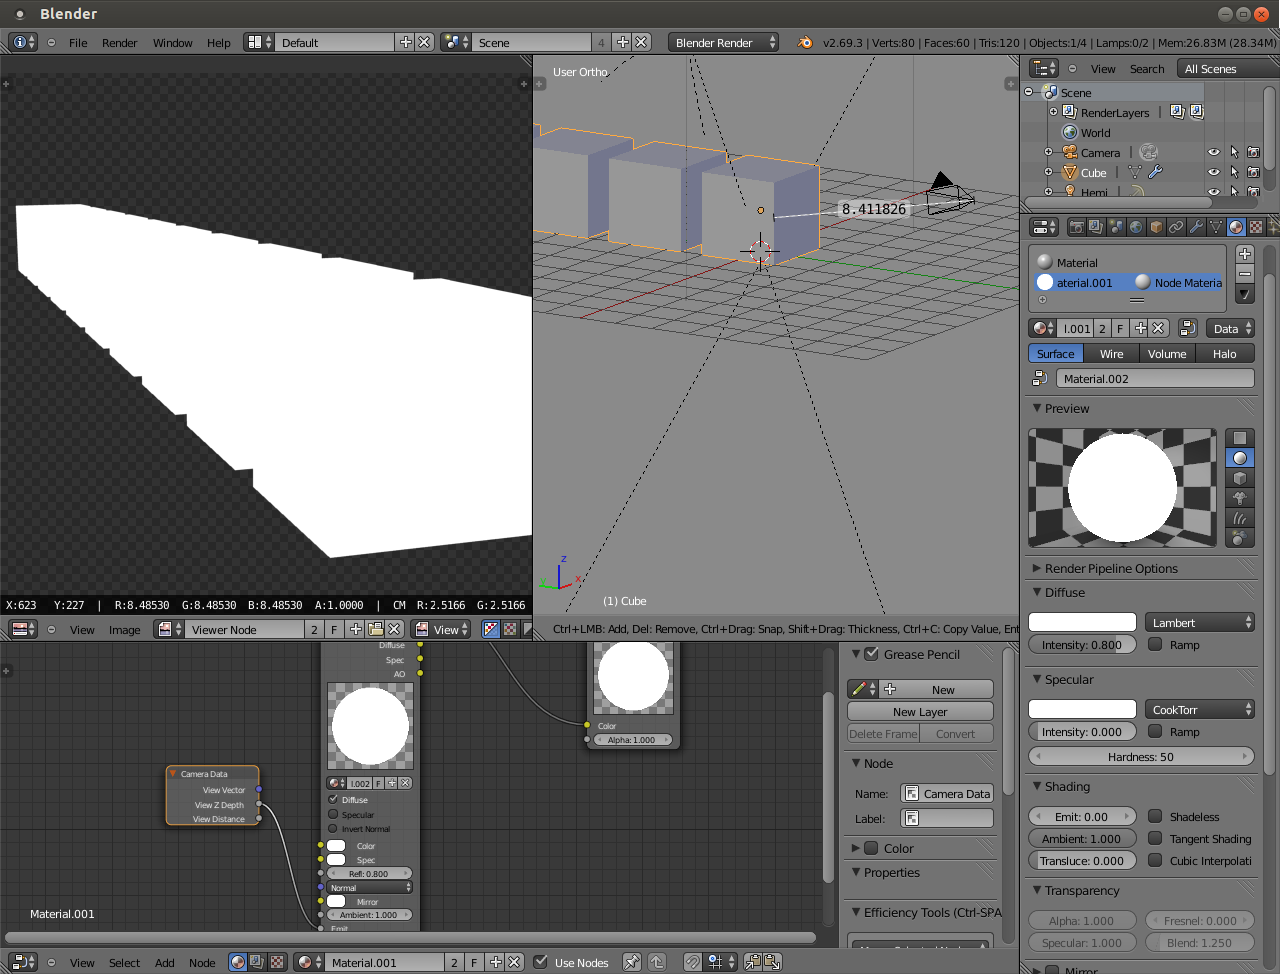
I was recently experimenting with Blender render materials to get antialized Z depth. Mist works and is easier to set up, but I wanted to try if similar set up can work with Blender render as it did with Cycles in Bartek’s tutorial (thanks btw).
And it does. Don’t know how precise this is but for the looks of it, can be precise enough.
In short: there is a node material which drives the emit value with Z depth. That material is an override for a separate render layer called “proper Z”, all materials for all objects gets replaced with that material but only for that render layer.
Unfortunately it was quite late when I took the screenshot so wrong render layer got highlighted, but the material override field is on there.
I thought this issue was solved, but the depth map still doesn’t seem to be linear. I am consistently getting a grey value of 188 halfway between the far clip plane and the camera where I should be getting 128 using both z and mist. I set my camera’s z clip and mist’s depth to 255 to see if I got the expected depth values of planes, but it seems there there is much more precision applied to closer depth then farther depth. Even with linear checked in mist, the halfway point seems to be 188 for some point. Does anybody know how to fix this?
The only way to get high precision is to not use an image map and instead use an actual z-pass which is numerical rather than something in the visual range. Any time you try to map z values to a visual range you’re gonna have some loss.
I noticed on another site someone told you that unity rendered depth maps to Logarithmic color space. I don’t know if color management works properly in Blender yet but here’s how to do it in log space:
Scene Properties buttons>Color Management tab>“Display Device:” button == sRGB>“Render:” button == “Log”. You’ll have to ask someone else if you need help with the other settings.
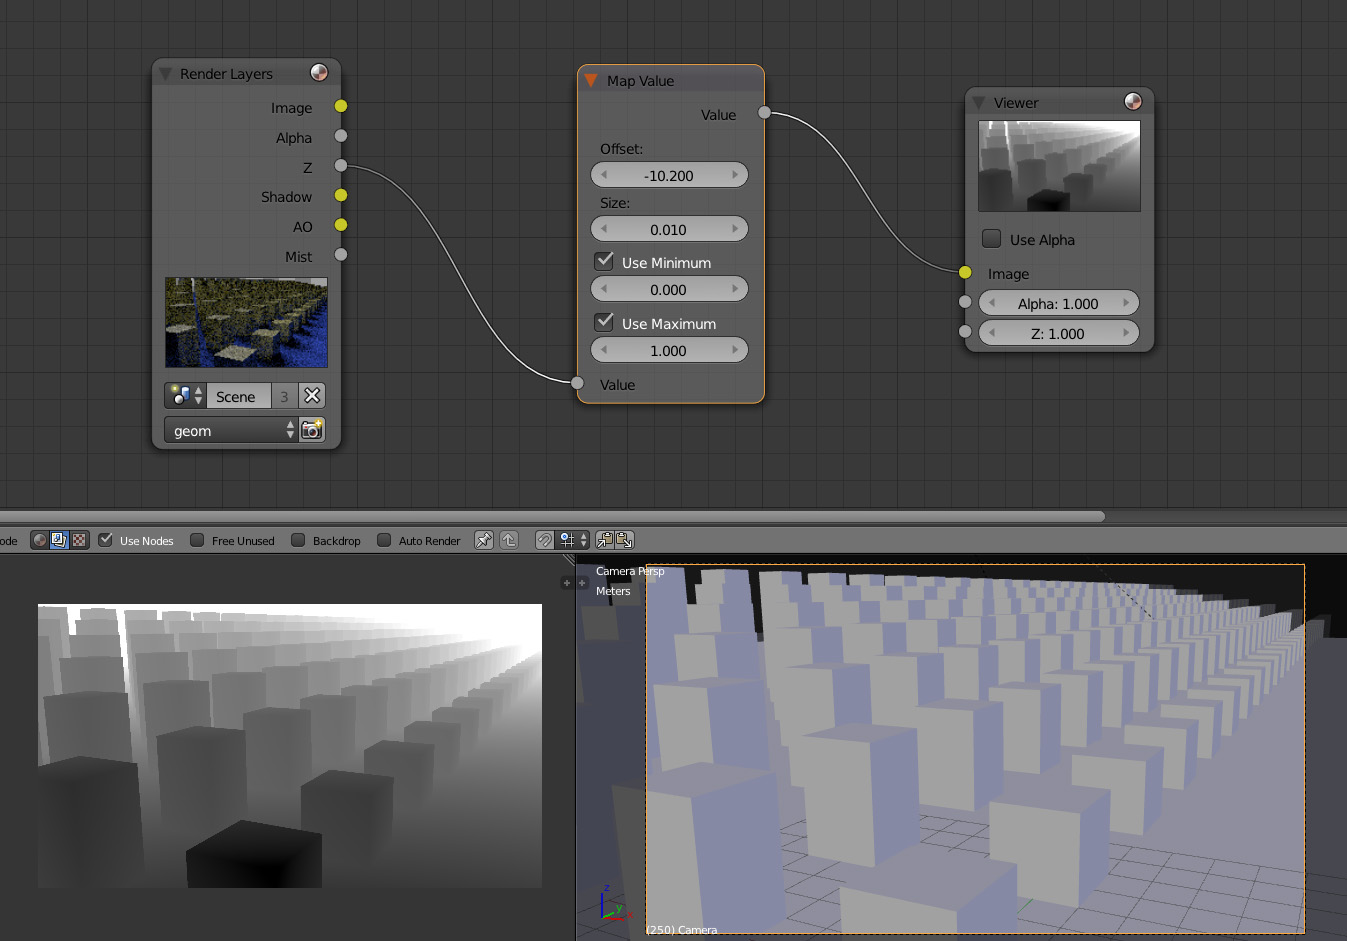
Were OFFSET is the clip point and SIZE is the maximum value of the ramp divided by the distance to the clip point 1/distance= size
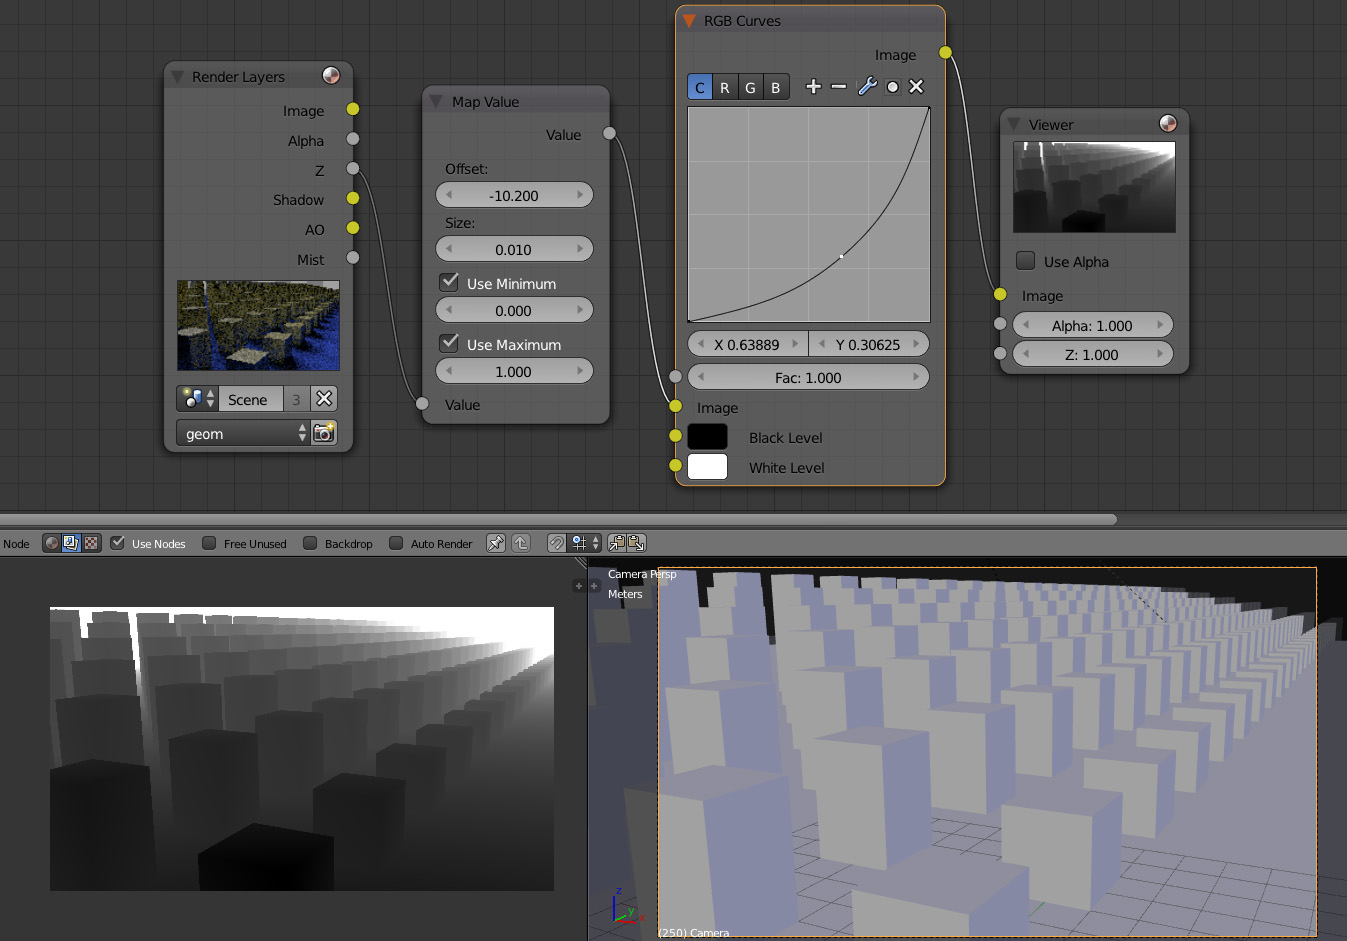
Now if what you need is non linear mapping you could apply an RGB curve after the Map value, and have the values land where you need them.
There are two ways to get the z ramp you want:
Given a clip distance of 10 units on the camera
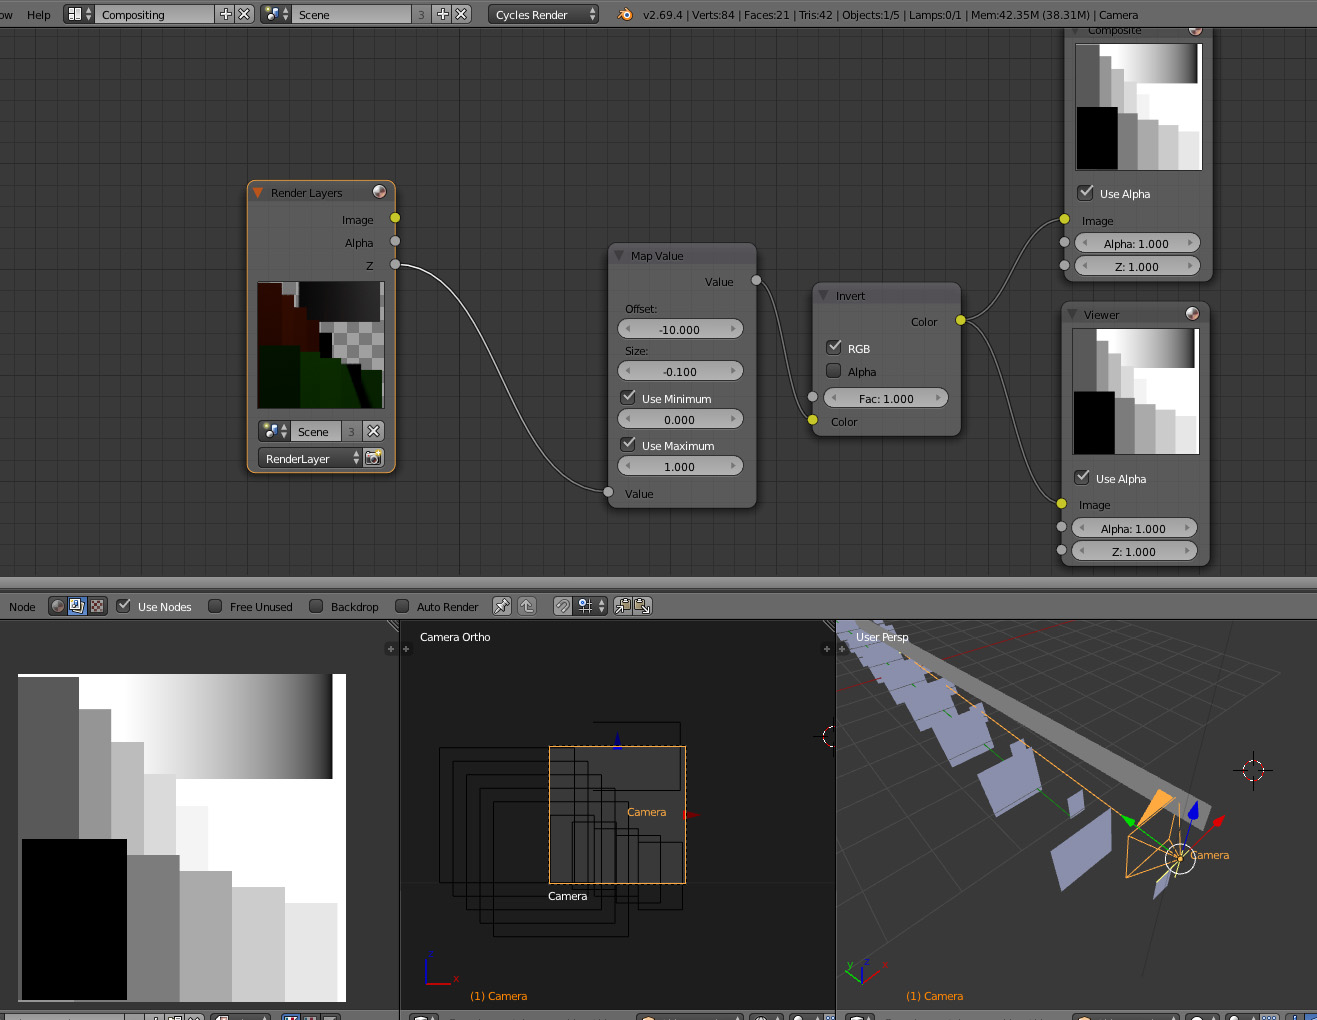
Option 1 you can map the z value with a negative offset of 10 units.
Then divide 1 (the maximum value on the ramp) between those ten units and that will give you the size (-1/10= -0.1)
This ramp will give you white for the closet object and black for the clip point, but you can invert that with a node:
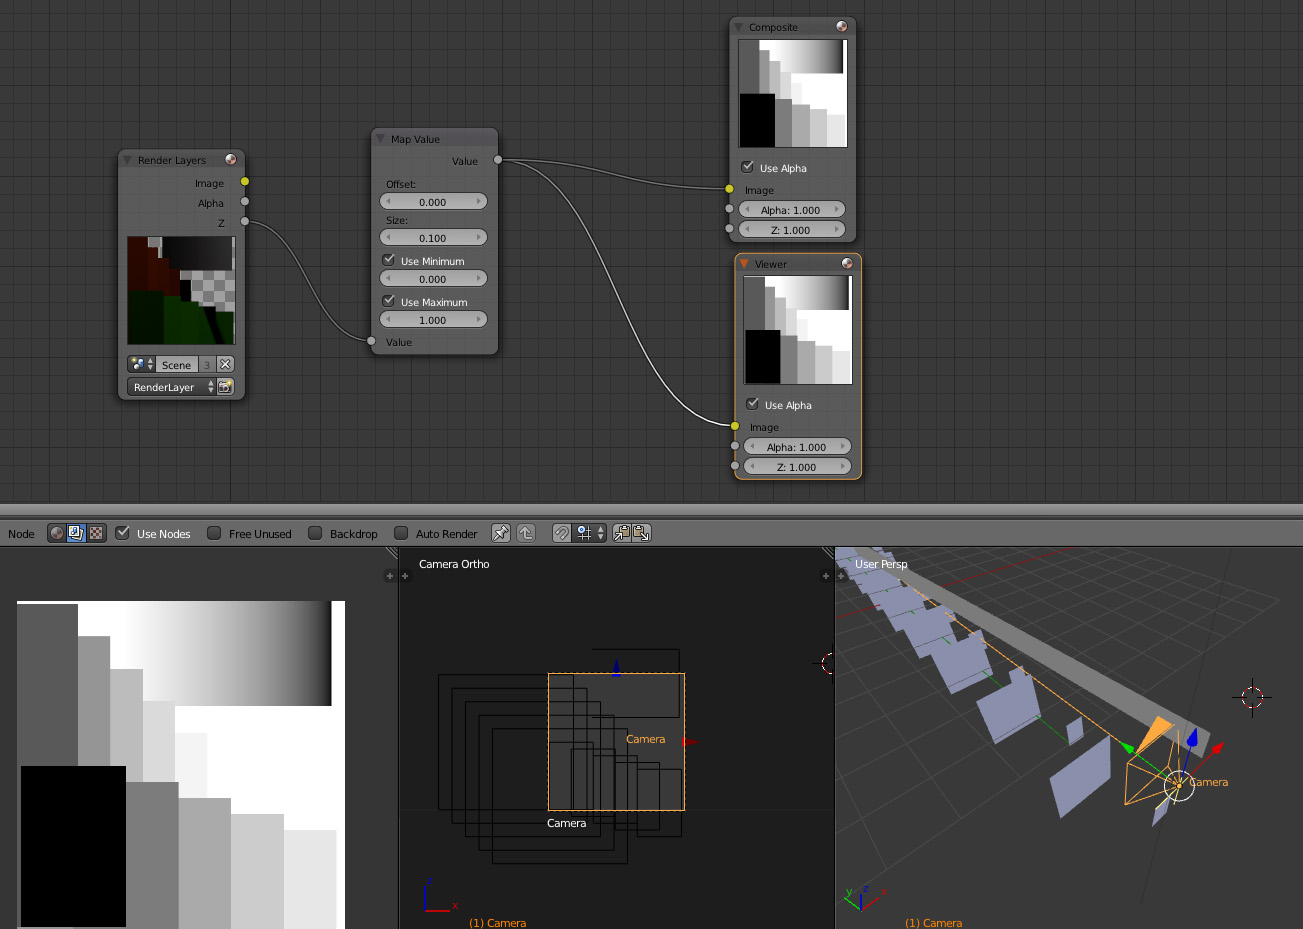
Option 2 would be to change the offset to 0 (that would be the closet distance from camera), make the size 0.1 (so that the ramp would go from 0 to 1 in 10 distance units)
Cegaton, your second post seems to be giving me 188 where it should be giving me 128. However, your first post did help. By going to color management tab and changing render from Default to Raw, it is now giving me the correct values.