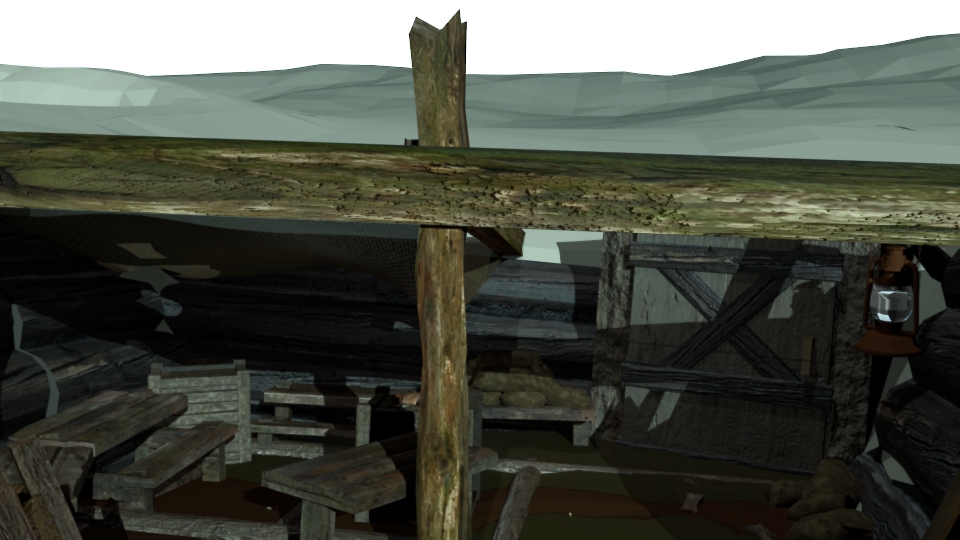
So I’ve been working on a trench scene and having problems with this:
First of all, the lighting is one basic light (I’m having troubles with it, just started over). Secondly, you can’t tell distance in this shot. Right now, I’m trying to figure out how to make this wood look more like wood. Any ideas?
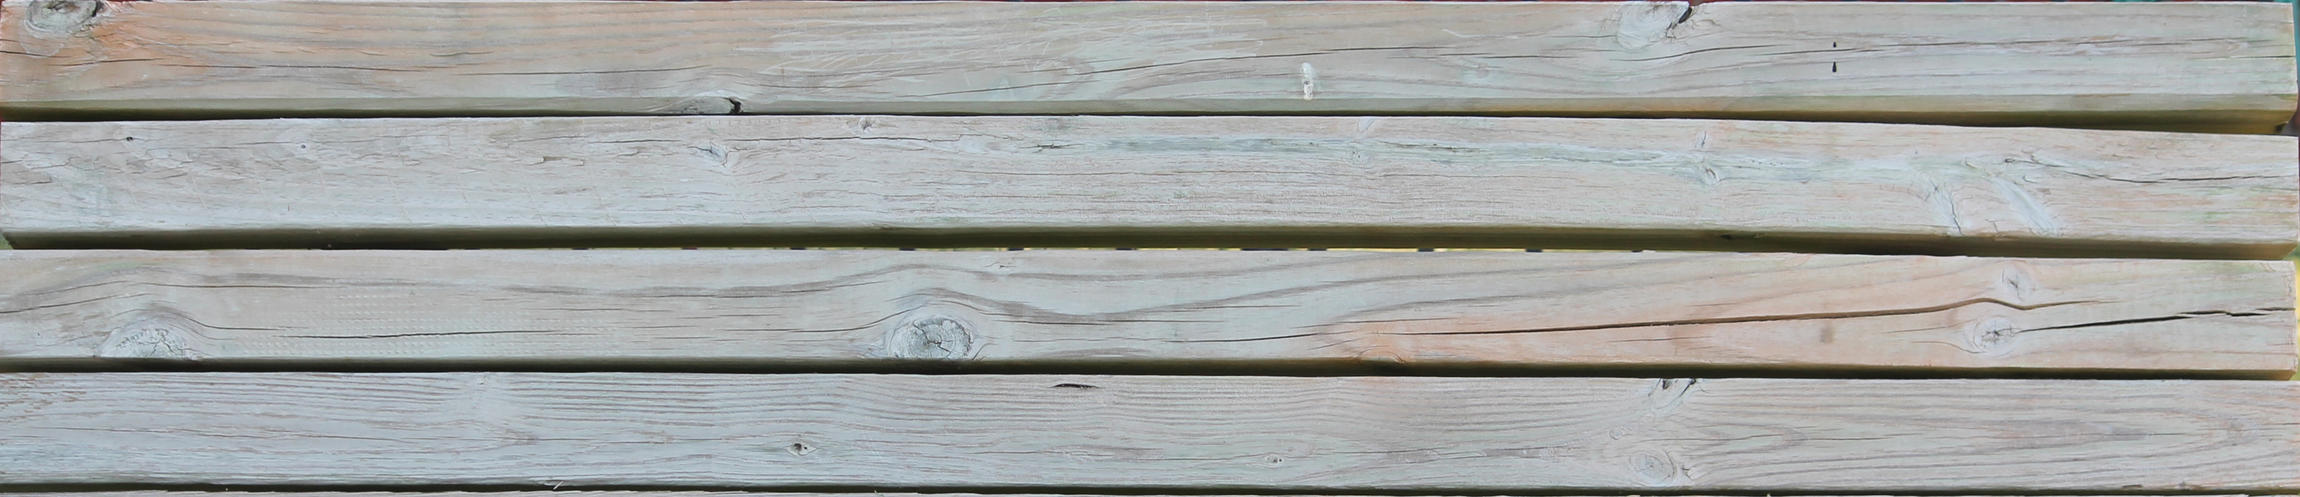
You need a good wood texture and then you need to made specular, bump maps from that texture in Ps or Gimp or some other software. Here are some textures I made personally with my own camera and Ps. You may have to invert the normal map or the specular. I always forget if black or white is the mask. Just crop out or cut and paste to make 4 different wood beams or just uv map them that way. I am a bit rusty on uv mapping and its a bit different in cycles so I would need to brush up on that to be any help.
ok so you just set the bump and the spec map to effect the displacement and the reflective mix factor, respectively. I think. I mean I have never done this in cycles. I’m sure its done with these types of images, but the node set up I’m describing might not be the best way to go about it.
Anyone that would like these textures may download them and use them however they see fit. I don’t need any recognition or anything either. Not rocket science after all.
Oh those images got downsized in file size by about 20x. Ouch. If anyone wants these in full quality, I’ll upload them to deviant in full quality and post a link, but they will probably be just fine even at 169kb instead of their original jpg size of 1.7MB. I also have the png but it is 13MB. I don’t see much difference between them.
nice textures, and yeah, I’ll make a separate spec map and normal map too. thanks! I had some earlier in the project, actually disabled them for some reason XD Anything else?
Well the spec map on wood esp rough wood seems unnecessary and the difference it makes isn’t always readily noticeable, but it can sometimes make all the difference. I don’t know really what you need. I think in the render you posted the displacement/bump ur using is way too strong and its not easy to tell from the picture, but it is possible that the texture is just not a high enough resolution. The images I posted are about as large as you’ll find anywhere. But there is a limit to how much you can cover with one texture no matter how big it is. Even if the resolution holds up ppl will pick up on the unrealistic scale of the detail like, if you take a picture of a sheet of plywood and try and make fence boards out of it. Res will be fine, but the detail will be out of scale.
It looks like either the bump map is too strong or you’ve stretched the texture too much. But I can’t tell from the render. Oh are u using cycles or blender render? You’re shadows might be a bit too sharp. It can be any or all of these things.
Wow, good thing you pointed those out. I thought it looked a bit substandard. My textures are 300DPI and RGB. I took a guess there, is that anywhere close to what they should be?
I’m also using internal
And what should I do about the shadows?
DPI is a bit tricky. Only a very expensive monitor will have higher than 72-100 or so dpi. I calculate most textures based on dimensions. 1024x1024 and such. It doesn’t matter how dense the pixels are in an image because like I said no one can see them past 72 dpi. What are the dimensions of your image? Length by width in pixels.
Oh as for the shadows, I forgot to add that in the last post, you need to increase the soft size of the light and the number of samples. Lighting gets complex in Blender Render. Cycles does all this for you naturally, but in Blender internal you have to fake it. Under your light settings you need to increase the soft size to something like 1-3 and if you render then you will see no difference until you increase the samples to the left of that. Depending on how large a soft size you choose you will need at least 6 samples to get rid of the noise. This will really slow down your renders, so whenever possible use spot lights and buffer shadows.(Buffer shadows are not as accurate as raytraced shadows, but they render much quicker. I don’t fully understand lighting in blender render, so I’m the wrong one to tell you when and where to use what light, but there are tons of tutorials on this topic. Just search youtube for “blender render lighting”.
Another thing that will really slow down your render times but will add a lot of realism is environment lighting and ambient occlusion. Set them to ray trace and and set both to around .2 with the ambient occlusion set to multiply. I never did get a real good feel for falloff values and all those other settings, but if you play with those you will begin to see what they do. Usually just the standard settings make a big difference to any render. You can also bake your occlusion to a uv texture and save it as an image, but this requires that you have a uv map for everything in your scene. I haven’t done this in a long time so best to verify all that by looking at a tutorial on baking ambient occlusion.
Ok, so we are on web DPI. I’ll fix the shadows, hope the softness helps. I’d like to use AO but its out of our rendering budget, but I might be able to do environment lighting. I’ll upload another picture and hopefully theres more things I can improve on.