I stumbled on a thread in the Unityforums someone posted a video where he extruded a face and get automatic a correct sized checkerboard uv map while extruding how is this done? They do not explain how it is done in the post nor in the youtube video. I am searching a few hours for now but I could not find a solution, what do I need to do to achieve this super awesome Blender feature?
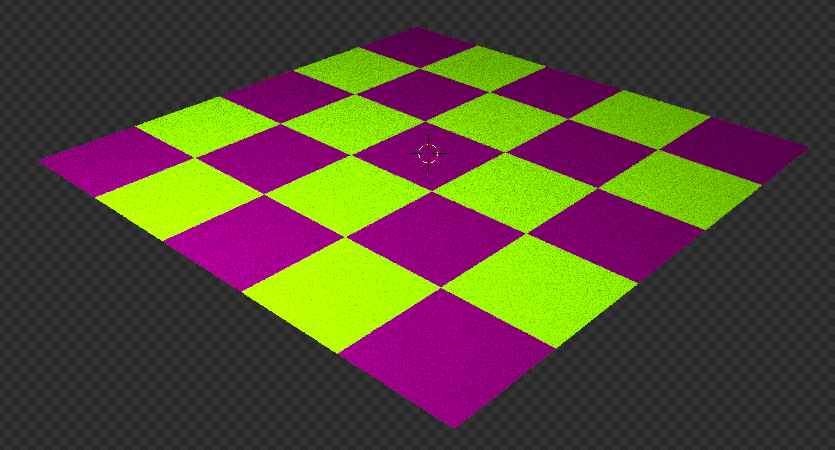
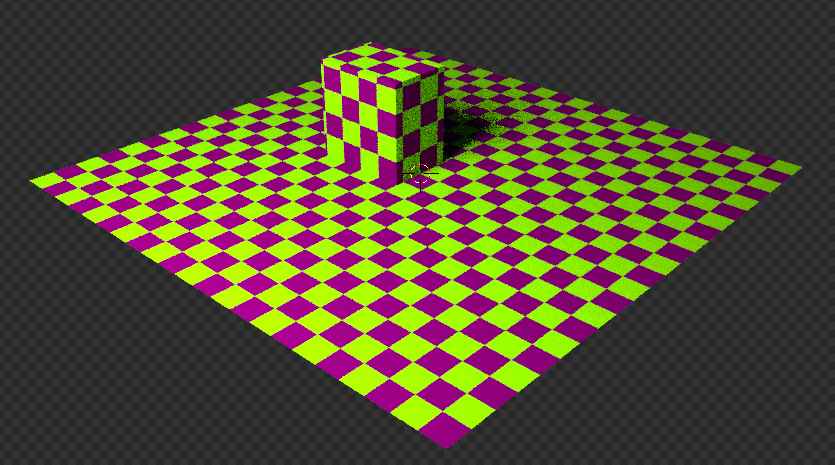
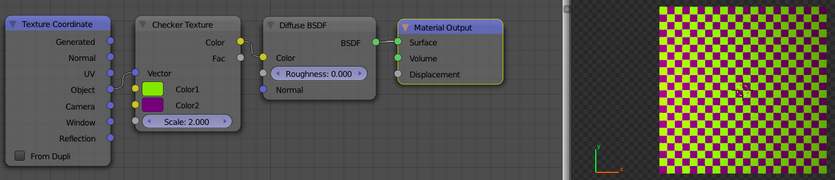
Watched the video a little but lost interest rapidly. Tested, this was easily replicated in blender by using object mapping in the texture coordinate node. No UV unwrapping necessary or desirable.
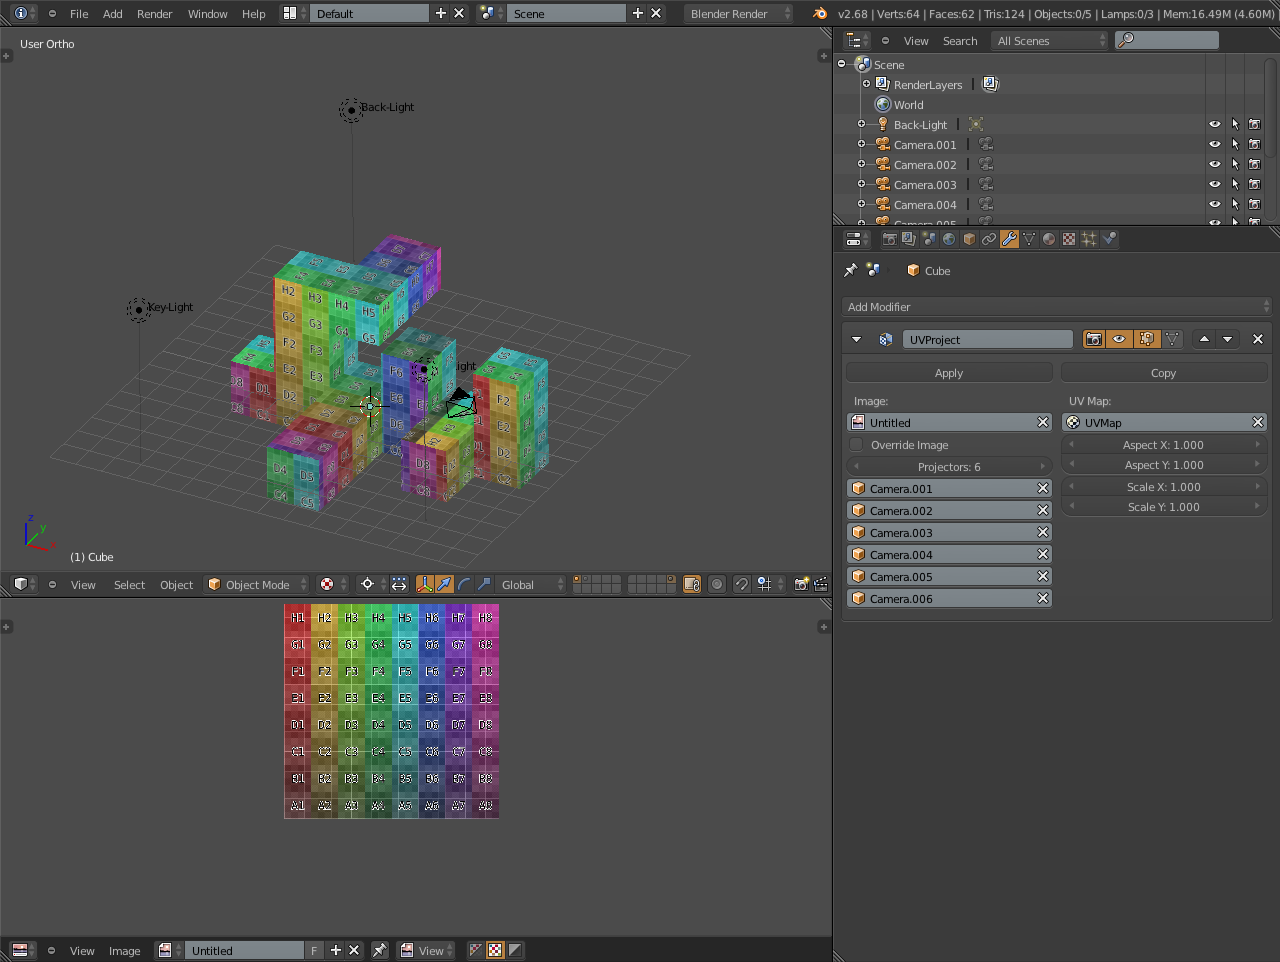
You can use this with Projection Mapping Modifier. I have added 6 cameras for projection mapping (Layer 2). You can easily extrude and manipulate your texture size as well. No need to unwrap the model. Just apply the Modifier and you are good to go
Step 1: Add A Cube and in edit mode, just unwrap (default, without seams) and keep it selected.
Step 2: Move to front View, by Pressing 1 on NumPad.
Step 3: In modifier Panel add “UVProject” to Cube.
Step 4: In “UVProject” load Image of your liking (This will be projected on the mesh. Tileable Image is good choice. Also select cube uvmap.
Step 5: Deselct Cube and Select Default Camera.
Step 6: Press Ctrt+Alt+0 on NumPad to move your camera view in front. From here you can adjust the size of Image Projection (How big or small you want your texture to show up) .
Step 7: After you are satisfied with the size of image projection. Continue with Duplicating the camera for Top, Down, Right, Left & Back View. Rotate all of them on 90 Degree angle (Make sure, Pivot is on “3d Cursor”).
Step 8: Select Cube and in “UVProject” Modifier , just below “IMAGE” set the projection to 6 and start adding your cameras for all 6 views.
Now, your good to go with unwrapping. This method is really useful, when your are trying to create levels for game. The only thing required is to Have a good Texture , properly set for Projection.
Hey DruBan thanks for your answer, is it possible that you upload your blendfile? Would be very nice because I never worked with nodes so I was not able to recreate it, and on the other side I not 100% sure if it will work when exporting without a UV layout.
Just started to reply and dont see your post dukejib I will check this out today, thanks for the in depth explanation and the blendfile will really help me a lot (Swithed from the good old 2.49 to the 2.68 a few month ago and it´s driving me nuts to relearn all the shortcuts and the entire ui at the moment)
Sorry Polygonaut, I did not realize you wanted to export it. This mapping is probably not going to be exportable. On the otr hand I’m not sure that the projection modifier is exportable either. You can probably bake either one. I will upload a blend in a little bit if you want.
This is the default (no node=Generated) texture coordinate.
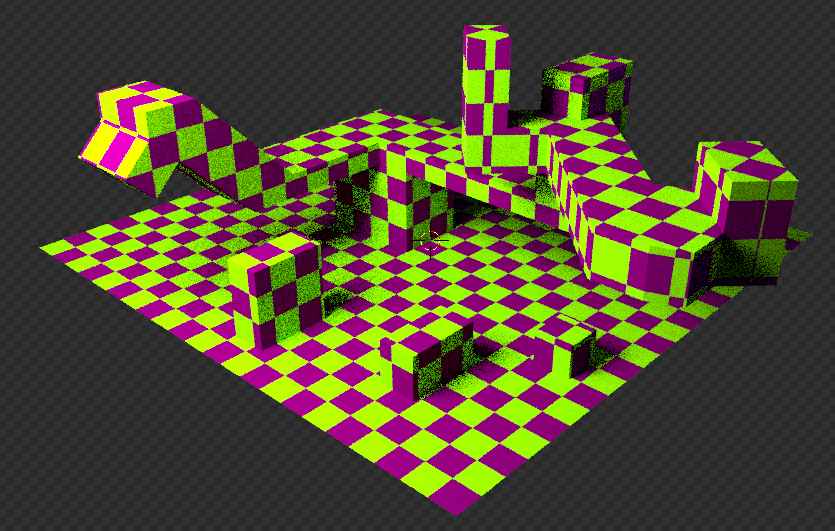
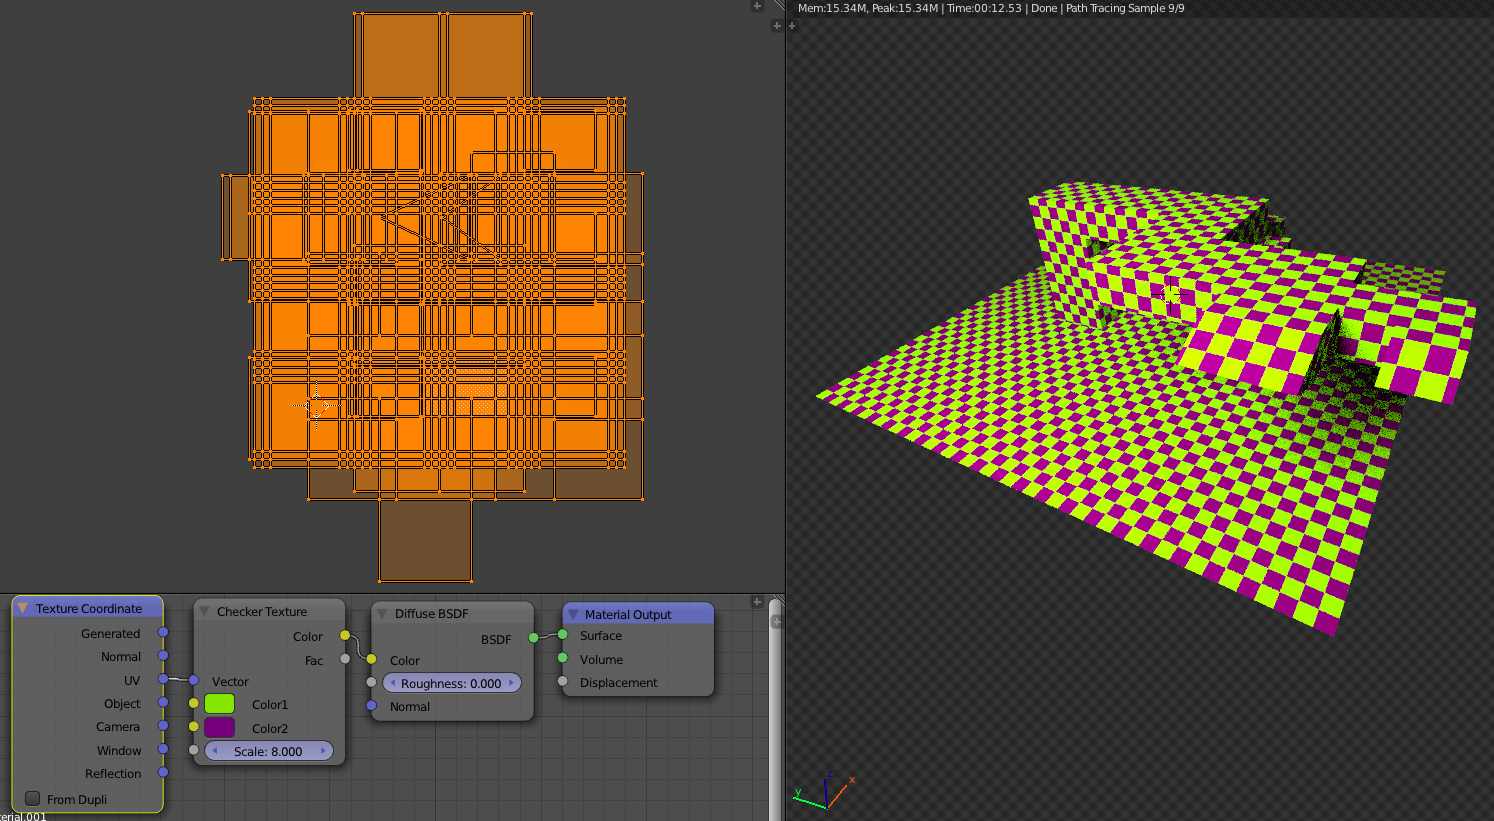
But objects like this that have a lot of faces that are oriented to the x y and z axes are really perfect for UV unwrapping with the cube projection. Of course you just have to do it AFTER all your extrusion, but if you do tinker you just have to unwrap with cube again and your texture will not be stretched…
Cycles doesn’t support textures in viewport yet, so checker texture or image texture set to box projection will not work in viewport, same goes to GLSL, other projections than flat (in this case global mapping set to cube projection) are not supported in viewport, but they will render correctly. This is not the case in unity, it will work there. For blender the only way to go for now is UV project modifier.
Sorry about that! When I read the original question I did not realize that the OP was asking about viewport drawing only. To tell the truth I hardly use it because cycles redraws rendered fast enough but I know the game makers don’t use rendered… my mistake.
yes, we game model makers don’t do renders, but this technique is a very good time saver for any level or set piece designer/maker. The execution is flawless and it works exactly the same in game engine as well (I tried it in unity3d it works fine).
Great explanation about the UVProject modifier dukejib, i had never toyed with it before, but after your post i can see there’s a good potentional at working faster with it on some models
dukejib´s method comes very close to the referenced video and works great, once the setup is done. the only thing that keep me away from marking the thread as solved is the long setup time which is in my eyes too much overhead if you are working with a lot of small objects that you want to create for prototyping. I think there must be something else that does the trick because in the referenced video is only one layer filled.
@DruBan, unfortunately it is essential to see the mapping in edit/objectmode, anyway thank for the explanation and the blend
@Polygonaut You just need to setup the cameras once. after that, keep on duplicating the same cube and just change the Image in UVProject modifier. No need to setup different cameras for every object. Screen shot is attached, where i just duplicated the same cube and changed the image for other objects. The Best thing about this projection is that you don’t need to worry about the texture quality or distortion/stretch/blur etc
For anyone looking at this in 2024+, just set texture mapping coordinates to Generated or Object, and set the second property on your image texture to “Box”.