Here comes my new craziest material:
I kinda invented a 3D UV mapping with memory of shape.  What it allows to do is to use a procedural material which remains constant when you cell-fracture the object where it’s applied.
Imagine a sphere where the material inside is red to blue and green from the core to the surface. Now, break it. How do you make the material of each shard remember where the core of the whole object was? I found a way. :eyebrowlift:

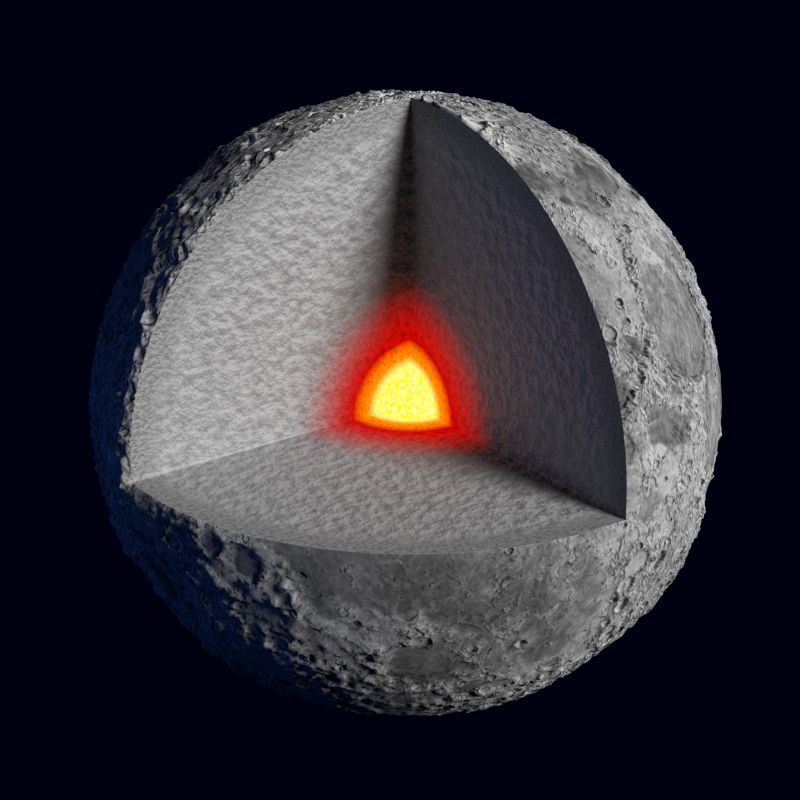
(I was thinking of a geode but I forgot a little detail: The hole in the center…) There’s more than simply a change of color from the core to the surface here. The “geode” has a crust which isn’t paper thin. There’s even a Displace modifier used on it… And a subtle bump map on the faces of the shards too.

Still not a geode but there’s a hole in the center now.  (Same material, different colors.)
It’s a bit difficult to see the progressive change of color. That’s why I have a video in preparation where it’s more obvious. (If I ever finish to render all the frames. I have always something better to do than watching the paint dry.)
In these 2 images, the sphere was cell-fractured, the shards were dropped on the floor as rigid bodies and re-joined in a single object. The material didn’t change during the whole process. The center of the sphere is long gone but the material still remembers it. :eyebrowlift:
Let’s see if I can explain clearly how it works.
Take an object. (It doesn’t need to be a sphere or a cube. Uneven dimensions work as well.) Create an UV map with "Project from View (bound) from the top orthographic view, and a second one from front orthographic view. That’s it, you’re done!
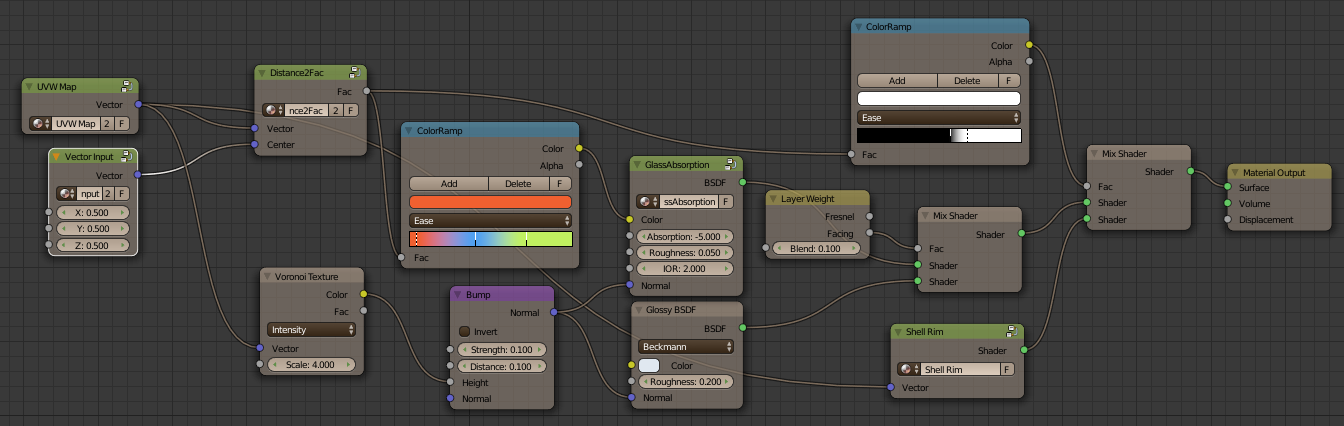
Well, almost… You put the 2 UV maps in a node tree as Attribute inputs. You plug a separate RGB to the vector outputs. The first map gives you U, V and zero. The second one gives you U, W and zero. You take one U, V, W and you combine them into a vector. Here were are. We have the representation of our object as UVW coordinates in a virtual cube of 1x1x1.
All that is needed is to join the shards to create the 2 UV maps. You separate by loose parts, reset all the origins to the center of geometry and then you can play with Bullet physics.
All the procedural textures from Cycles work in 3D. That’s really useful. (Expect some weird things with geometric textures like the checker… And I suddenly realize that I haven’t tested the brick texture.)
We can do all kind of calculations on this UVW vector to use it as factor, or even calculate the distance in between a point and a “center” (which doesn’t need to be in the middle of the object) and also turn it into a factor. (That’s exactly what the “Distance2Fac” group node does.)
No blend file this time. I must still implement the spherical randomization part which goes with the “Distance2Fac”. (The idea is just here, waiting to flow trough my fingers into Blender.) And I have the moon to break in another thread!
I hope that was interesting (altho long). :eyebrowlift2::eyebrowlift:

 I love this, do you plan on making a video tutorial covering this as well? I am very impressed with all the materials you’ve made in the past, but this is excellent!
