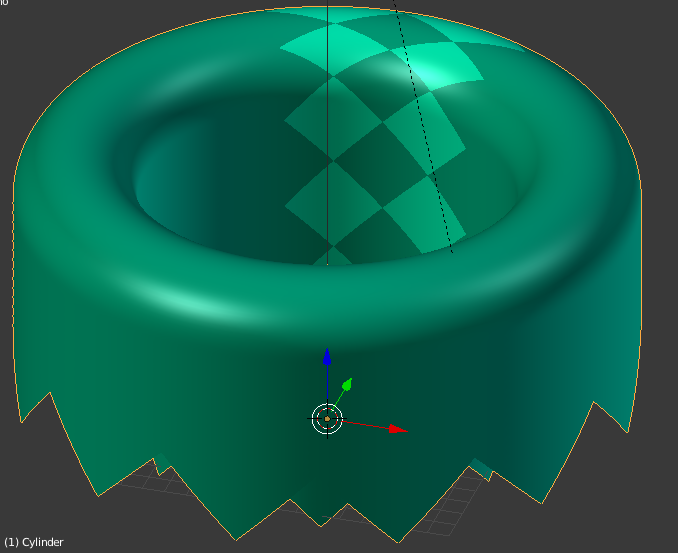
I am working on a roof of a look around tower.
The basic shape geometry of it is made up of two cilinders and a half torus.
I would like to add a diagonal pattern to the model, thus made a diagonal topology.
Figured out modelling such “pattern” would produce an enermous facecount,
so now I’m trying to make it from a texture.
I’m asking if anyone knows how to unwrap a model alike, to a map made up of same sized squares?
Got any ideas how to handle this situation?
Your help will be much appreciated.
When you select all in edit mode and U -> reset, it maps all faces so that they fill the whole UV area.
But I would keep the model simple and for the diagonal pattern I would use a procedural texture. Could then bake that onto an image if needed. Procedural textures don’t show up in the textured shading mode so it could be a tricky to lose the seam with the texture/UV size but can be done. Could use rendered shading mode and use render border (ctrl+B, ctrl+alt+B to clear) to limit the rendering to a certain part of an object.
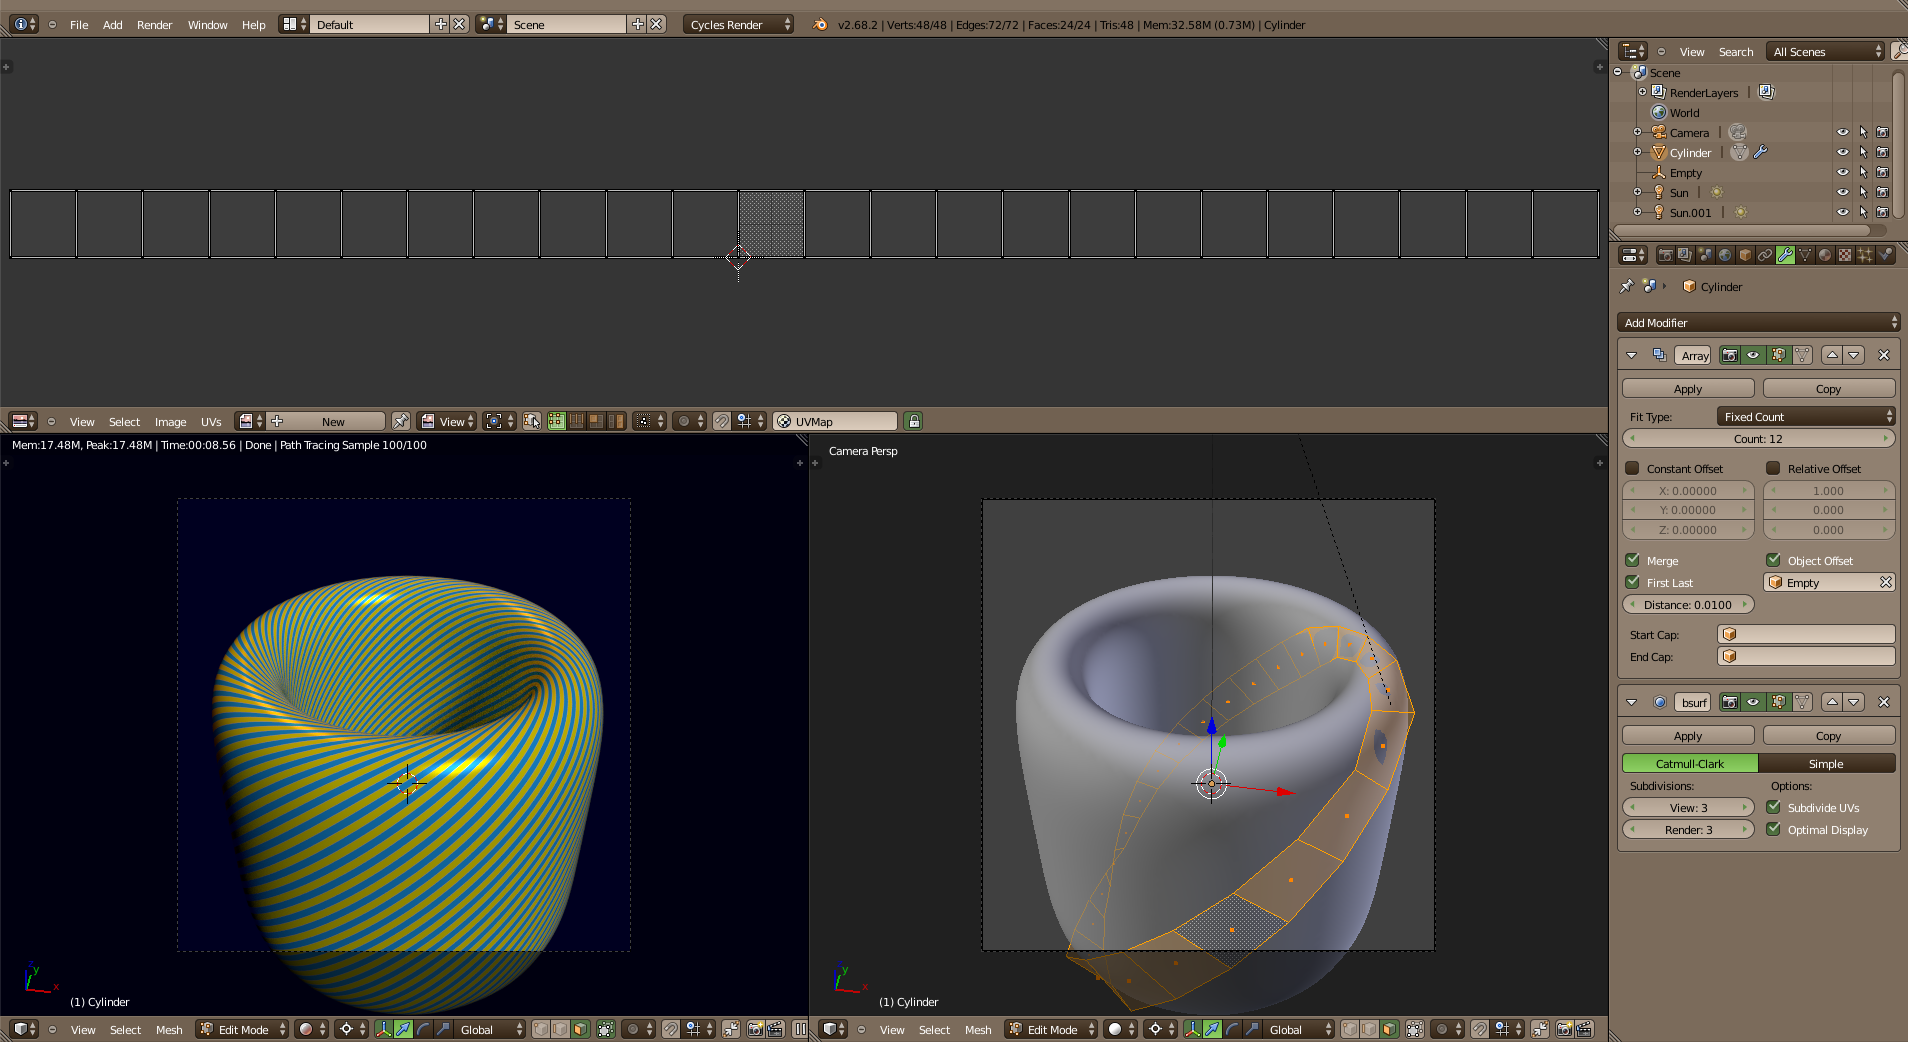
To reset the UV is an idea. Another one is “Follow Active Quad”. But first, you shouldn’t apply the Subsurf modifier. That’s useless unless you want to edit the mesh in high density.
I re-built your object with 24 faces and an array. And there’s even more faces than needed because I mirrored it vertically to avoid the texture distortions created at the bottom by the Subsurf modifier.
All I did here was to select all and to set one rather regular face to active with [SHIFT RMB] twice. [U] Unwrap –> Follow Active Quad –> Even. Done! No seams required! (Sometimes you need to reset the UV before “Follow Active Quad” works correctly.)
After that, you can apply the Array and cut the bottom to make it flat… or not.
It’s a bit beyond me what you suggested as I have never seen 90% of them in action.
What I do understand is you would remodel it with a lower face count and use the subsurf modifier.
But it was all intentional, and was modelled without any modifier, as manual as one can get, with all vertices placed in position.
While I have to admit the geometry on the torus looks off as
the construction wasn’t for a turn at an even angle around the torus’s,
but to connect the right vertices of the cilinders.
So I don’t want to remodel it.
The thing I’m looking for is the way how to unwrap the model
to produce a map like this: https://dl.dropboxusercontent.com/s/admv1ooyk5c68d8/uwr1.svg
Where each square refers to those marked with seams on the model, containing 15*15 faces.
That way I could design a good pattern the best.
Even if there is no other than the manual way, is it possible to join separate objects together, with their uwmap still working?
That way, facecount could be easily divided by 12, that would be much easier to handle.
Maybe if there was a snapping option at uv editing or such that I didn’t know of?
First, your texture can’t work. It has a jagged edge. Faces can be made to look like that… but you don’t really want to do that. Too many problems with the Ngons (faces with more than 4 vertices).
Here is a solution to make things really easy for you: Restart from scratch! And learn to do things the easy way. That’s part of the learning curve.
Any way, you’re not really happy with the shape, so… Start from a torus. Look in the Tools shelf ([T], on the left) or press [F6]. Just after having created a shape, you have some options. Reduce the number of vertices. Major segments: 24, Minor segments: 12. (That’s enough.) Delete the bottom half. Select the 2 bottom edge loops. ([ALT RMB] and [SHIFT ALT RMB] over an edge.) Extrude the cylindrical part and add some edge loops. (Squarish faces are always better.)
Select a face along the cylindrical part then [A] to select all. [U] Unwrap --> Follow Active Quads --> Edge Length Mode: Even.
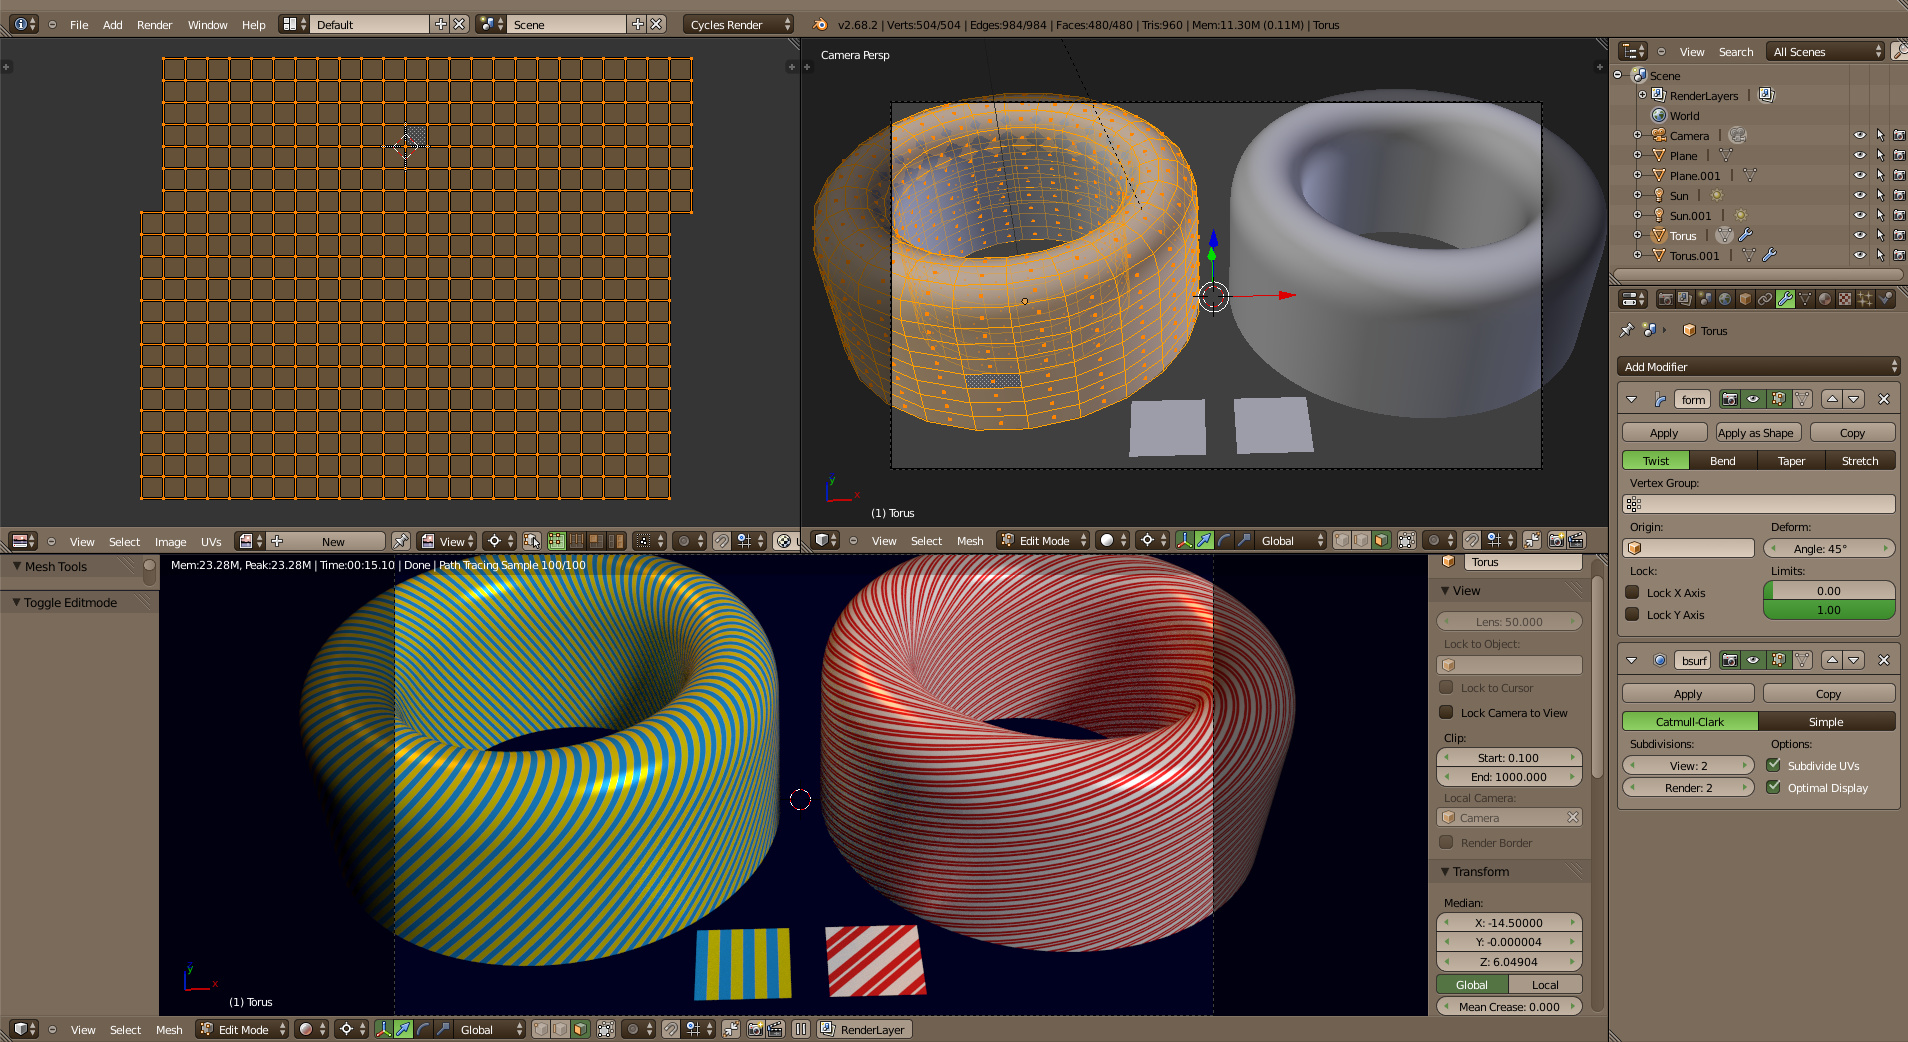
On top of that, you can use any tileable texture you want. Just make sure it’s square. If you want a grid of 15x15 little squares, go for it! If you find doing diagonals too complicate, just make vertical stripes, you can twist your mesh.
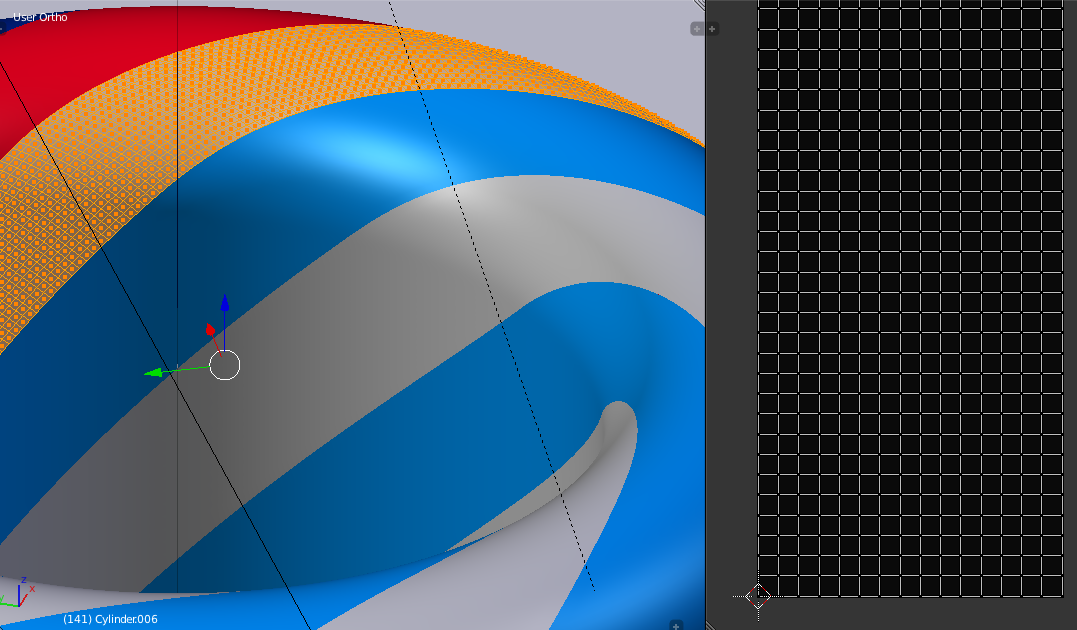
On the left, the mesh twisted at 45° with a texture made of vertical stripes. On the right, no twist but a texture made of diagonal stripes. On top, the UV map. (I didn’t use an array this time.)
Of course, both objects have a Subsurf modifier. It’s here to make things easier for you. You just need a rough shape and the modifier makes it smoother.
You can apply the Simple Deform modifier (the Twist) if you need to join this object with another one. Don’t worry, the UV map will survive the operation. Just be careful in joining, the modifiers aren’t included and the resulting object will have the modifiers of the active object (the last selected one before to join).
But there were no ngons used, just regular faces with four vertices.
I do want to use that model, and do wish for such a “diagonal” texture -which is only diagonal to the overall shape.
Not to the topology.
Again, I won’t remodel it as it is as good as it could get.
The non-consistent angle is intentional.
I had to accept that all aesthetical aspects at once cannot be fulfilled.
So chose the ones I liked more.
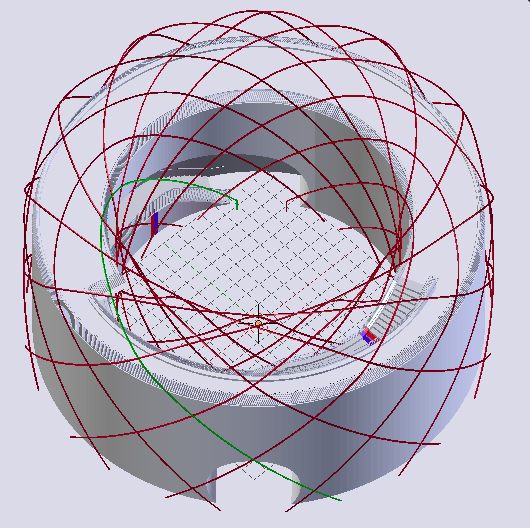
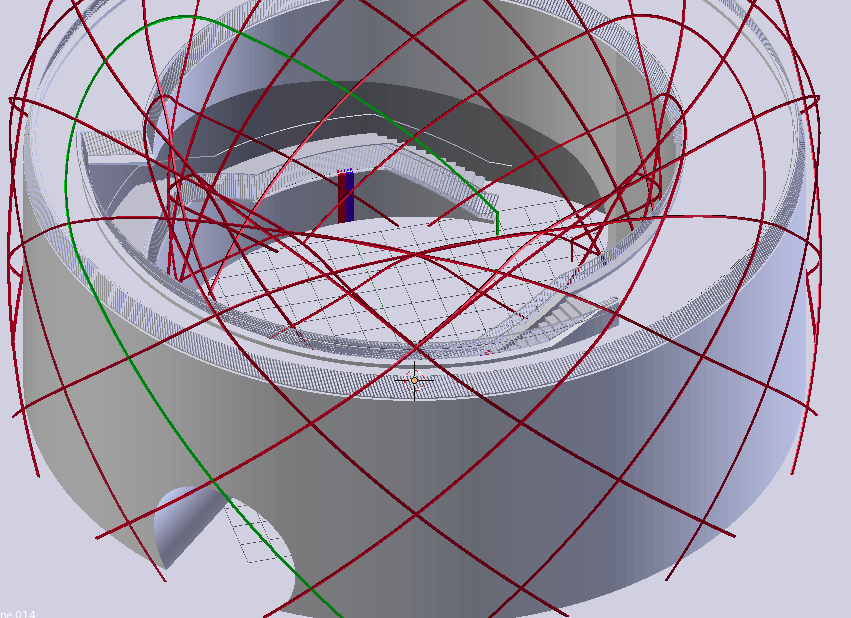
This is how the steel structure would look over the building:
With a 180° turn around the vertical axis, each rod gets from an exact height and back,
while having an elevating value of 45° on the cilindrical parts.
Resulting in a clean look from the sides, especially from the entrance:
All the dimension values were chosen of the overall shape apart from that diagonal pattern,
resulting the 45° helixes can’t connect with eachother on a linear turning around the torus.
The pattern I want to add to that model would follow the raster of that steel structure.
Will try to make it from joining 12 parts that were unwrapped before and see if that works.
Now time to move on with the texturing:
is there a way to use svg’s for textures?
Found vectex was created in 2008 for blender 2.49?
I will design the pattern in inkscape as it will be made up of straight lines,
and I would avoid the rasterisation of the svg design if it’s not necessary.