current thread icon:
Hello Everybody!
This is my first post here. The sculpt was made in sculptris (years before), texturing and rendering was completed using blender with cycles (with minor pp in GIMP). C&C’s welcome!
current thread icon:
Hello Everybody!
This is my first post here. The sculpt was made in sculptris (years before), texturing and rendering was completed using blender with cycles (with minor pp in GIMP). C&C’s welcome!
I like that one alot!
beautiful render!
Thank you for the comments!
I’m posting another earlier work, a play with explode modifier and particles
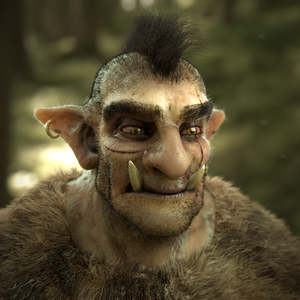
I like the ‘woody’ guy… very nice work… wouldn’t mind a tutorial on how you did all that… oh… you said you did it in sculptris… still it would make a very nice tutorial just the same…
I’ve prepared a small tut for the woody guy or logman as i named it. I love the tutorials made by the community because i have learnt the most from experimenting guys like Andrew Price or michalis.
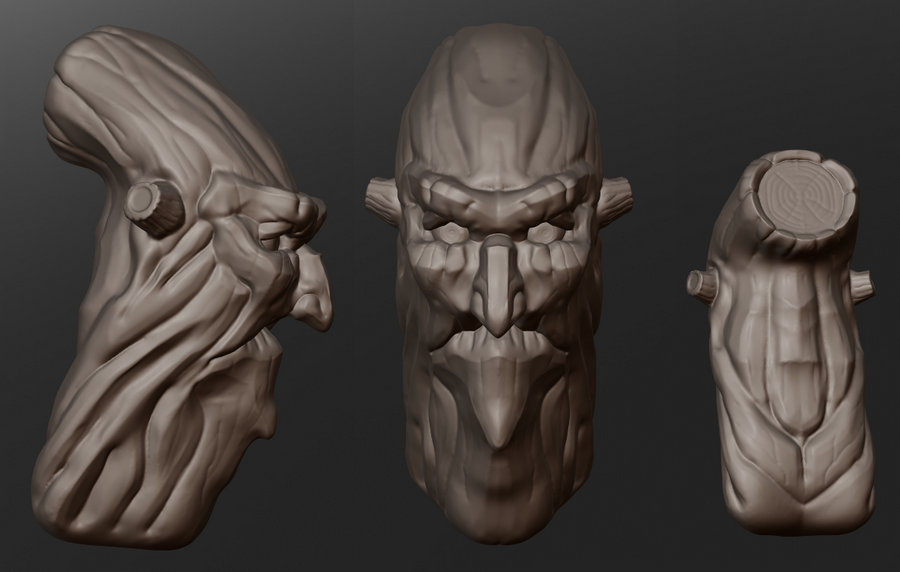
SCULPTING
It started as a doodle 2 years ago in sculptris. I used flatten and crease brushes mostly. The final sculpt was around 600k tris.
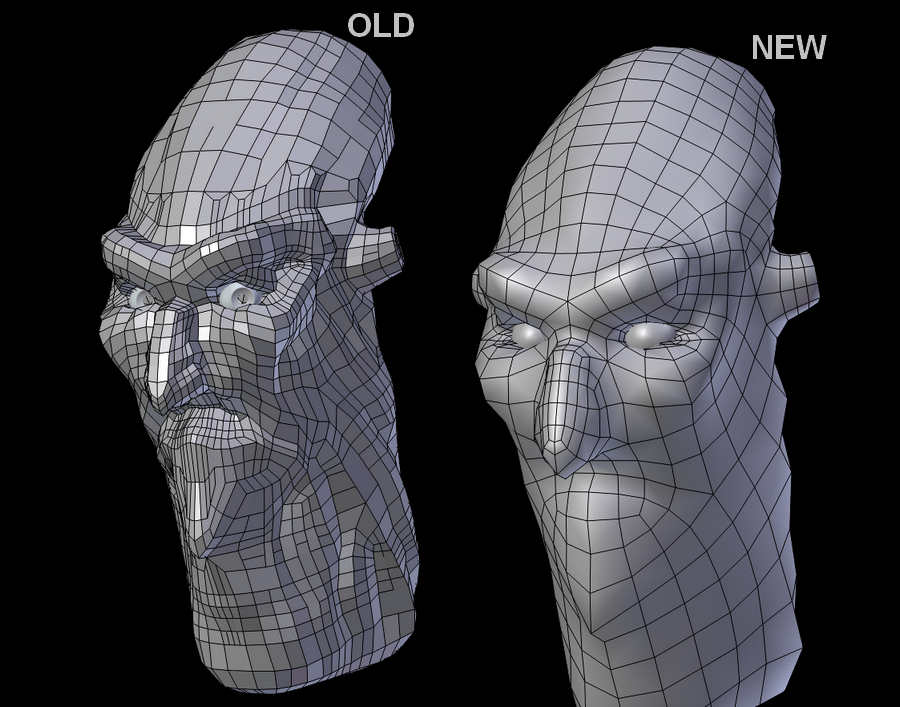
RETOPO
At that time i tried to retopo it. It was horrible. Chaotic loops and waay to much polys. It took very much time and attempts to have a nicer looking lo-res mesh. I just love manual retopo work, but it is time-consuming, and the only way to learn it is practicing a lot. My skills are still poor, but they are at least better than few years before.
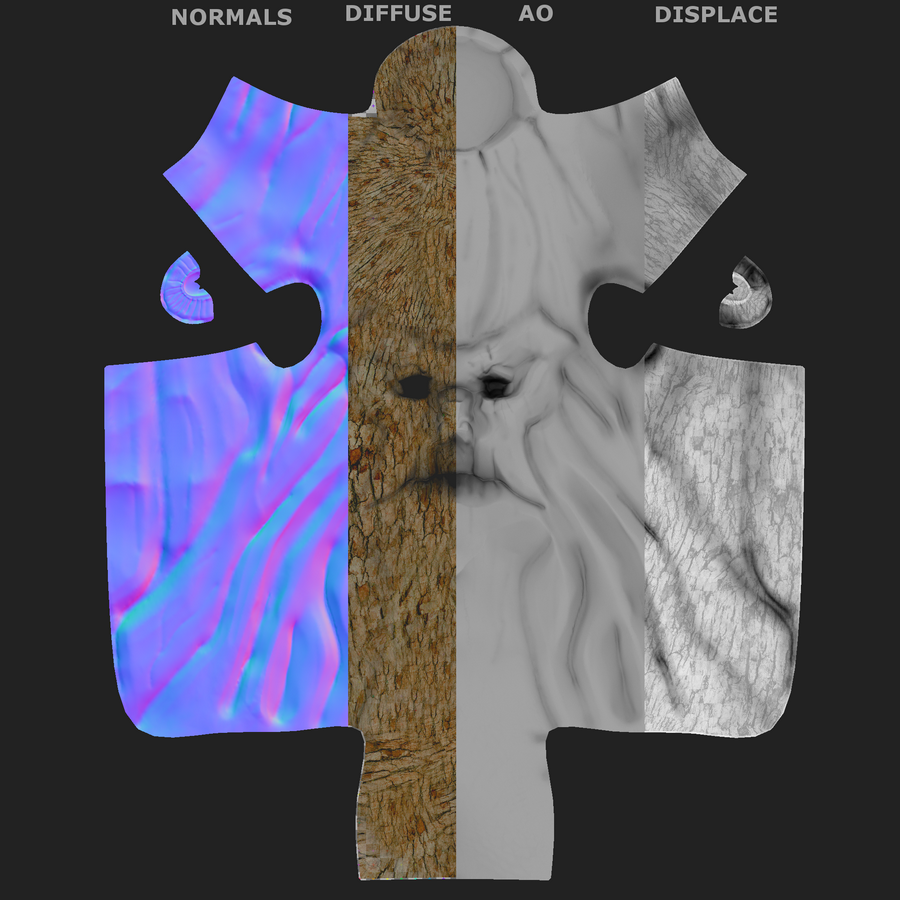
TEXTURING & MATERIALS
After retopo i marked some seams and simply unwrapped the lo-res mesh. Then i baked the normal and ao textures (at 2k resolution) using blender bake option. I also created a blank diffuse texture which i painted then with a bark texture brush. I also used the desaturated version of this texture for displacement.
At the time i created the textures i did not know how to properly set up uv’s eg. minimize stretch so some parts, like the nose, are not very nice.
MATERIALS
The material setup in cycles is very basic, nothing fancy. A mix shader of diffuse and glossy materials with displacement for bumps.
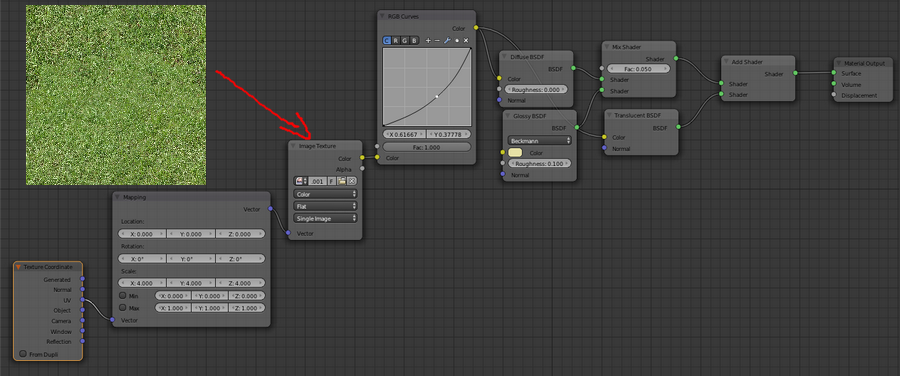
HAIR
For hair i created 4 particle systems (hair, eyebrows, moustache, and beard) with very similar settings (STEPS are very important at render settings! Too low values ~2 give ugly results, higher values >10 kill slower PCs). The material for hair is based on the BlenderGuru tutorial as it can be seen on the node setup.
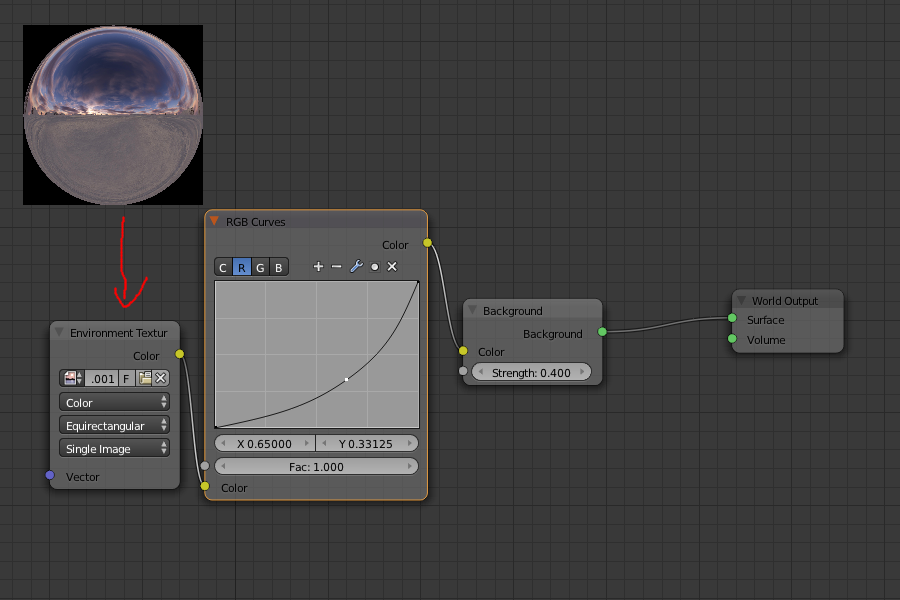
WORLD SETTINGS, CAMERA & RENDERING
For environment lightning i used an angular map for environment texture. I tweaked it to get a more blue result (for a night scene). I also lowered its value to have a “darker lightning”.
Beside that i used to additional light sources: One plane to simulate moonlight (emission strength 20, slightly blue) and one to simulate fire (emission strength 30 orange color).
I set the camera’s focal length to 150 mms and the DOF radius to 0.05
I rendered it at 1500*1500 resolution @ 500 samples in cycles with GPU (GT520). It took ~3 hours.
Logman is brilliant! Love it! 
I love this guy!
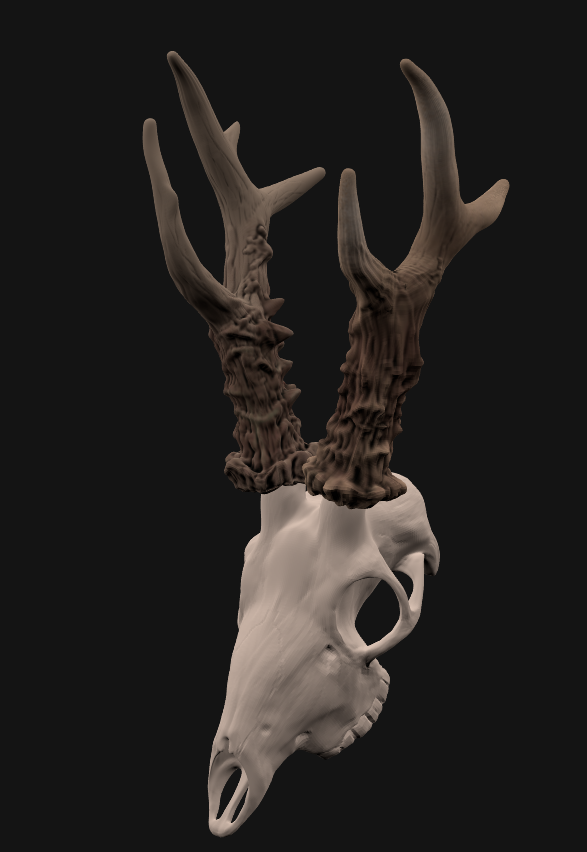
Hi all!
This is my latest work. I created the base with dyntopo, then retopo+texturing. The hair is still not the best, i know, but it was a nightmare for me (tweaking-waiting-tweaking-waiting-bah).
Cheers
Hey thanks for the tutorial that was great!.. I’m still getting my feet wet with scuplting and texturing in Blender so this helps alot…
Beautiful work, I love it.
Very nice! Did you use SSS on the original post? I wish my “really quick texturing” looked like that!
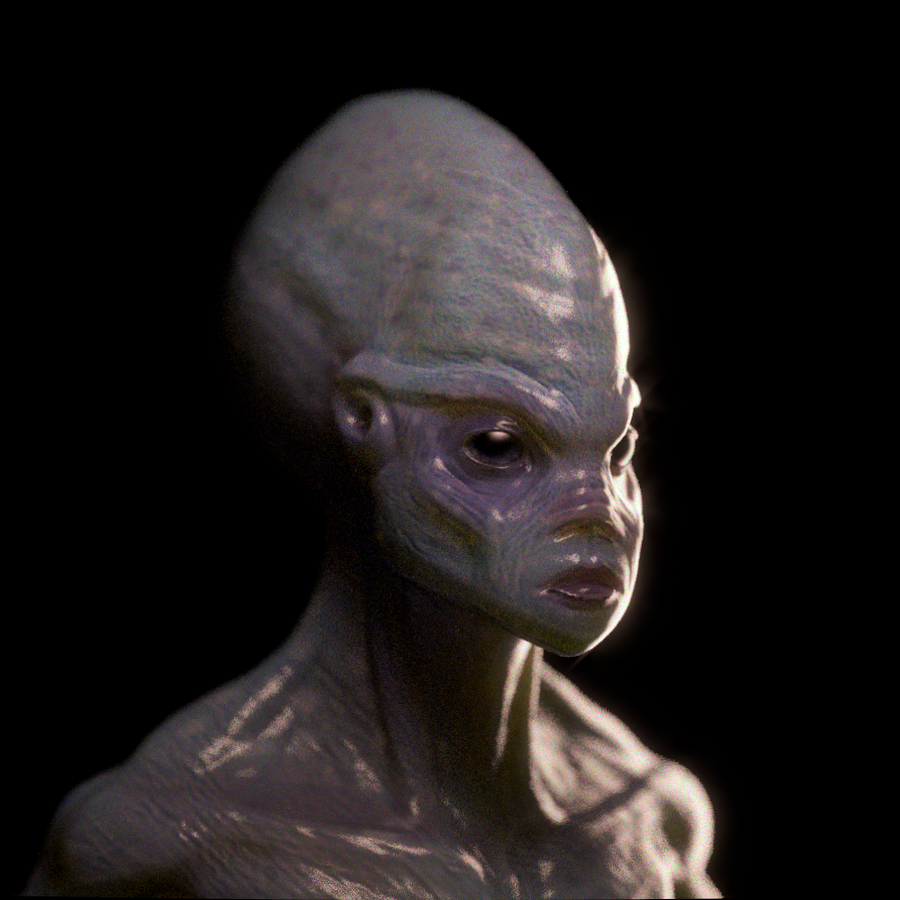
@marc dion - Thank you! I hope i can post the finished work in the near future.
@ejis02 - Thanks! For the alien head i used cycles SSS (diffuse+sss mix mixed with glossy shader). I just love that effect however i still cannot reach good results. I need more time to understand how it works and to tweak for better looks.